|
|
|

|
|
| Search | Car Forums | Gallery | Articles | Helper | AF 350Z | IgorSushko.com | Corporate |
|
| Latest | 0 Rplys |
|
|||||||
| WIP - Motorsports Post topics for any "Work In Process" motorsports vehicles in this sub-forum. |
 |
 Show Printable Version | Show Printable Version |  Email this Page | Email this Page |  Subscribe to this Thread
|
|
|
Thread Tools |
 05-08-2008, 11:11 PM
|
#1 | |
|
AF Enthusiast

Join Date: Mar 2003
Location: Zephyrhills, Florida
Posts: 981
Thanks: 4
Thanked 5 Times in 5 Posts
|
Whit Bazemore's Matco tools Funny car
With the Miller lite charger out of the way its time for some NITRO!!
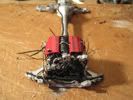
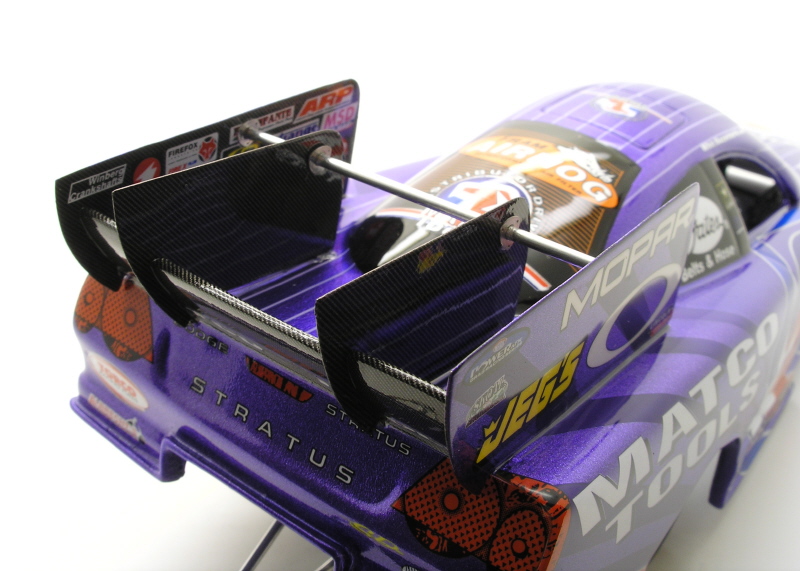
Clay paved the way with hs Brute flopper so lets see if I can keep up. Thanks goes out to him for his advice on these things. Just to catch you up, the Competition Resins body is completely finished. I used HOK Pavo purple base and Kandy Burple over that lightly applied to the front going heavy to the back. 2 sets of slixx decals were applied followed by 3 coats of clear and polish. 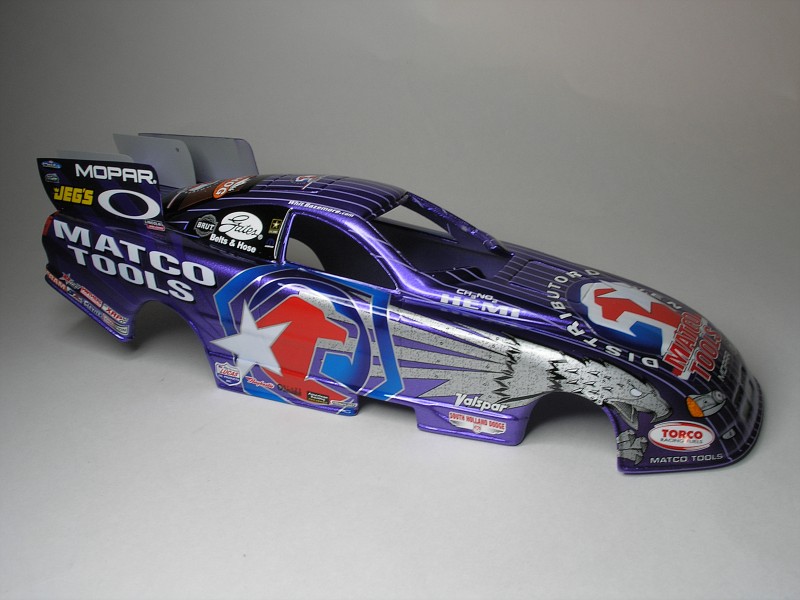 Instead of using the Wing ends in the Competition Resin body kit I used thin brass for better realism. They will be covered in CF decal on the inner parts. 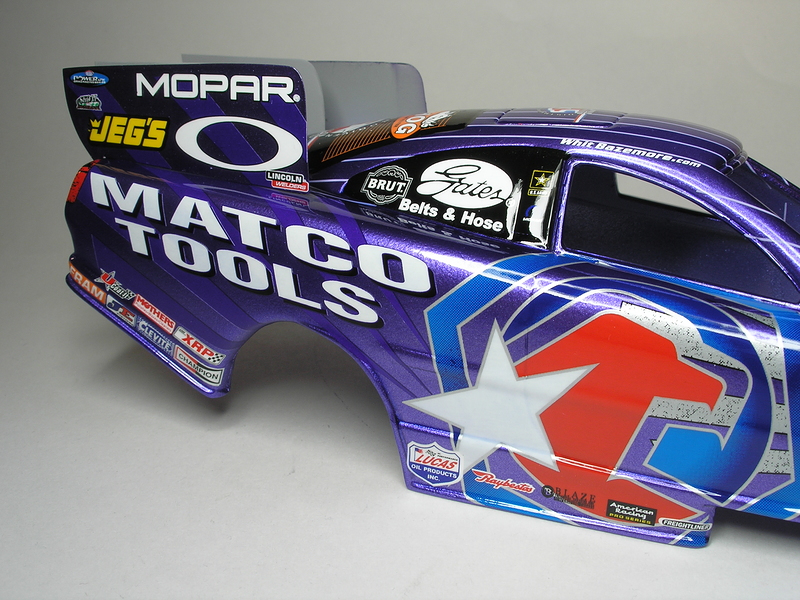 Chassis was reproduced from the foot plate forward using .060 tubing and lengthened using advice from Clay to allow more room for the engine, timers etc. Paint is alclad steel with clear orange/black weathering and weld beads made with silver  Some scratchbuilt pieces here. 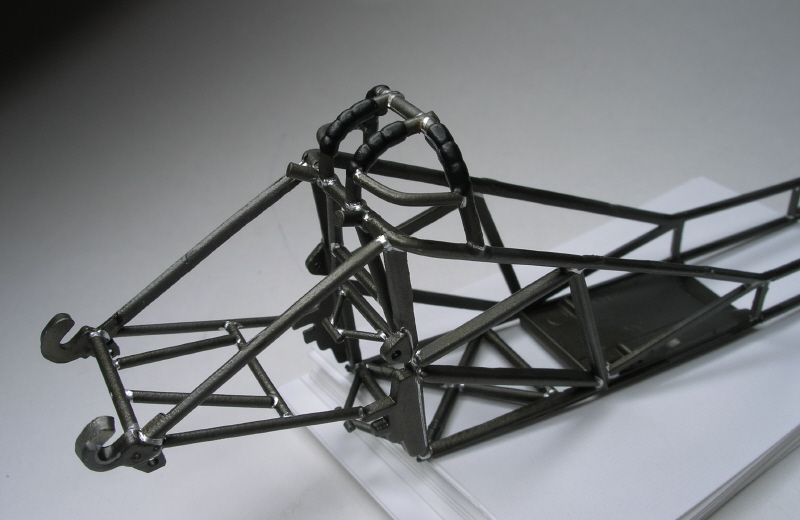 Front a arm detail using RB motion hardware 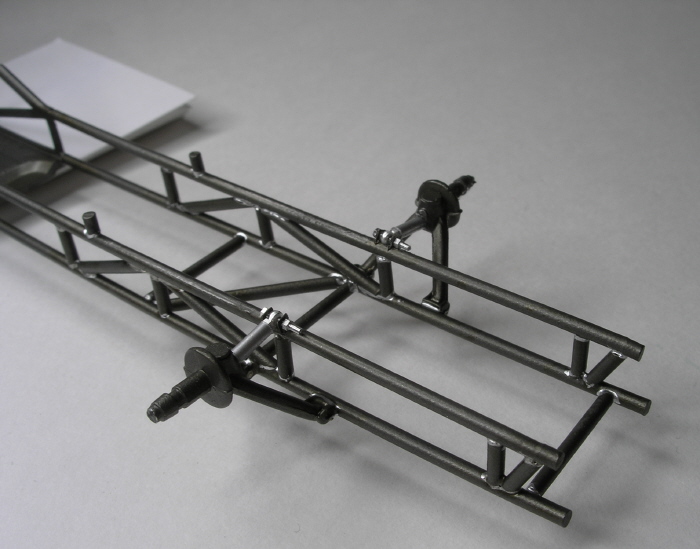 Wheels and tires are complete and accurate for this car. Fronts are Competition resin mags flipped backwards and covered in BMF with pegasus front drag tires and chrome trim rings. Rear slicks are Competition resin and wheels are pegasus weld racing. 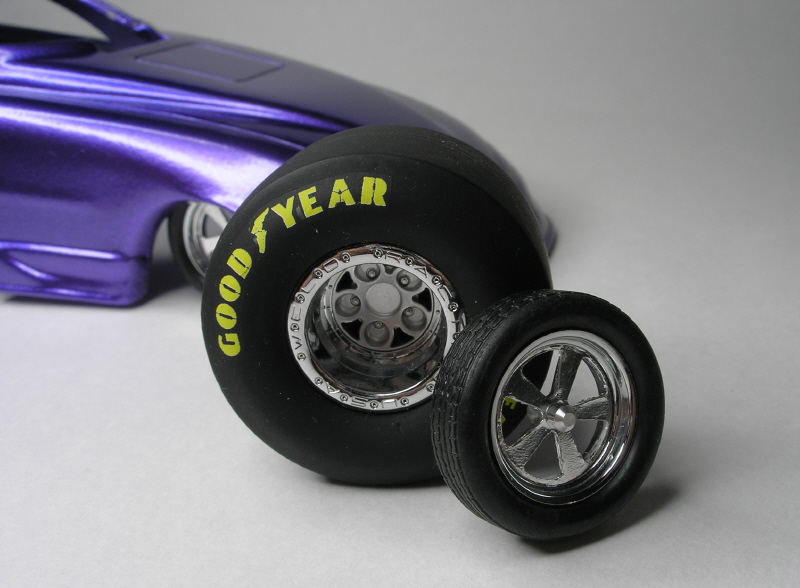 Here is tonights progress. I have the car sitting on its own tires and wheels! I carefully set the ride height by gluing a piece of 5/16 aluminum tubing inside the body for the rear chassis hooks. This is the hinge the body will pivot on. The front was set adding plastic in the nose that hits the edge of the front frame. I sat the CR Kobelco blower and scoop on the engine. These need sanding to lower them a bit... More on that later... 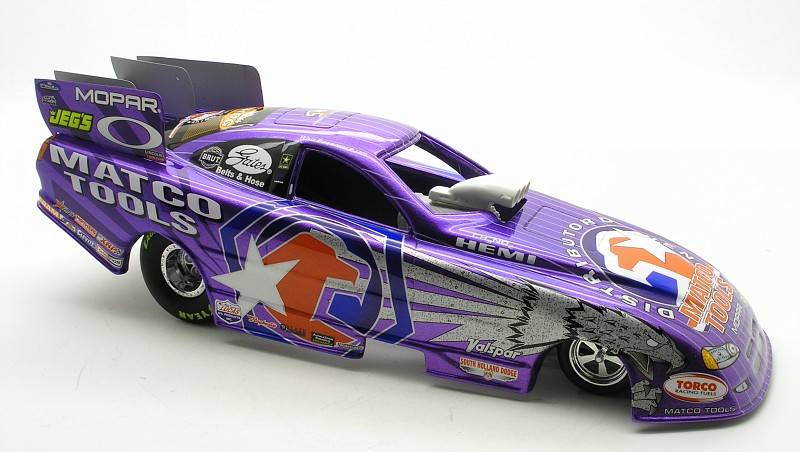 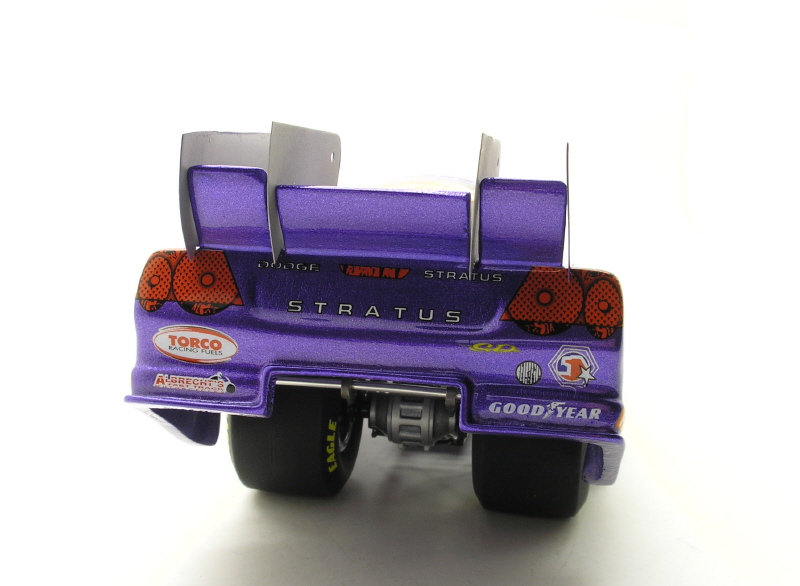 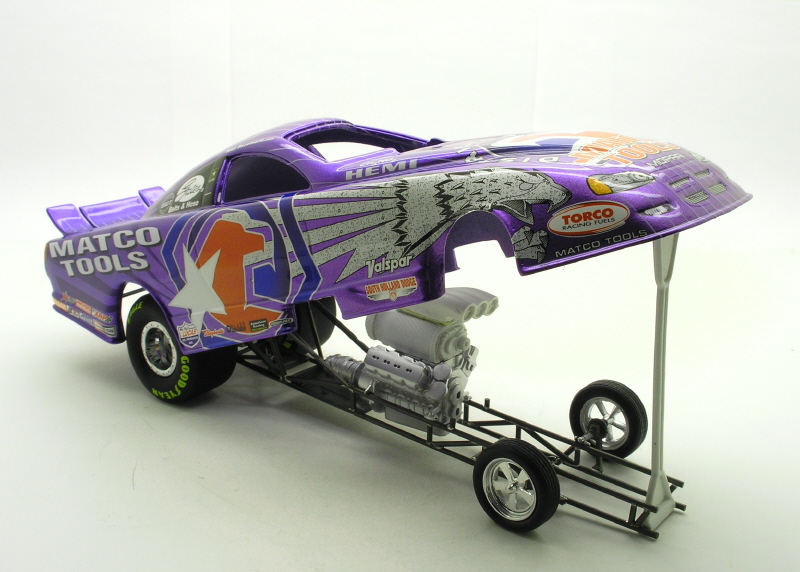 |
|

|

|
|
05-09-2008, 07:13 AM
|
#2 | |
|
AF Enthusiast

Join Date: Dec 2005
Location: Southampton
Posts: 701
Thanks: 27
Thanked 8 Times in 8 Posts
|
Re: Whit Bazemore's Matco tools Funny car
Hey Buddy - nice to see this one again....but should'nt it be in the WIP forum. It don't look finished to me!!

__________________
Paul On the bench; 2003 LV Rossi Honda RC211V |
|
|
|
|
|
05-09-2008, 07:23 AM
|
#3 | ||
|
AF Enthusiast
Join Date: Jan 2008
Location: Cumming, Georgia
Posts: 740
Thanks: 41
Thanked 41 Times in 39 Posts
|
Re: Whit Bazemore's Matco tools Funny car
Quote:
|
||
|
|
|
|
05-09-2008, 11:51 AM
|
#4 | ||
|
AF Enthusiast
Join Date: Dec 2005
Location: Southampton
Posts: 701
Thanks: 27
Thanked 8 Times in 8 Posts
|
Re: Whit Bazemore's Matco tools Funny car
Quote:
 I really enjoyed Clay's flopper (  ), so this should be worth seeing... ), so this should be worth seeing...
__________________
Paul On the bench; 2003 LV Rossi Honda RC211V |
||
|
|
|
|
05-09-2008, 06:00 PM
|
#5 | |
|
AF Enthusiast
Thread starter
Join Date: Mar 2003
Location: Zephyrhills, Florida
Posts: 981
Thanks: 4
Thanked 5 Times in 5 Posts
|
Re: Whit Bazemore's Matco tools Funny car
 I think it was about 12 AM when I posted this thing last night.... LOL!!! I think it was about 12 AM when I posted this thing last night.... LOL!!!Hopefully a moderator will move it? DaveT |
|
|
|
|
|
05-09-2008, 11:53 PM
|
#6 | |
|
AF Moderator
 
Join Date: Jun 2002
Location: Cincinnati, Ohio
Posts: 12,565
Thanks: 363
Thanked 47 Times in 43 Posts

|
Re: Whit Bazemore's Matco tools Funny car
Done.

__________________
http://public.fotki.com/tonioseven/ |
|
|
|
|
|
05-10-2008, 02:46 AM
|
#7 | |
|
AF Regular
Join Date: Jul 2003
Posts: 446
Thanks: 5
Thanked 1 Time in 1 Post
|
Re: Whit Bazemore's Matco tools Funny car
Very nice Burple scheme.
NHRA Drag Racing is one of my favourite types of modelling subject. As is ANDRA (Aussie Drag Racing) in particular the Top Doorslammers. I really should try some of these myself. The access at our local drag strip is awesome for references. I am sure this one will be awesome as well.
__________________

|
|
|
|
|
|
05-10-2008, 09:13 AM
|
#8 | |
|
AF Regular
Join Date: Jan 2008
Location: Gastonia, North Carolina
Posts: 322
Thanks: 4
Thanked 5 Times in 5 Posts


|
Re: Whit Bazemore's Matco tools Funny car
Oh, I was hoping you or Clay would do another dragster model.
I just loved the look of the ones that Clay did, and Im thinking that my first real extreme build is probably going to be a dragster of some sort, since I think it would be moderately easier to pull off than a Nascar model would be. |
|
|
|
|
|
05-11-2008, 07:13 AM
|
#9 | |
|
AF Enthusiast

Join Date: Feb 2006
Location: Melbourne
Posts: 1,057
Thanks: 5
Thanked 26 Times in 26 Posts
|
Re: Whit Bazemore's Matco tools Funny car
Looking good Dave. Nice seeing the bare bones before anything is added to that chassis.
|
|
|
|
|
|
05-11-2008, 09:02 AM
|
#10 | |
|
AF Newbie

Join Date: Sep 2007
Location: cleveland, Ohio
Posts: 38
Thanks: 0
Thanked 0 Times in 0 Posts
|
Re: Whit Bazemore's Matco tools Funny car
You
__________________
Latest Builds: 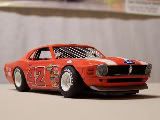 
|
|
|
|
|
|
05-11-2008, 09:05 AM
|
#11 | |
|
AF Newbie
Join Date: Sep 2007
Location: cleveland, Ohio
Posts: 38
Thanks: 0
Thanked 0 Times in 0 Posts
|
Re: Whit Bazemore's Matco tools Funny car
You and Clay Kemp always give me so much motivation and incentive to create detailed but clean builds. Thanks
I'll be looking forward to watch this one develope as i try to finish one of my own projects. [pics soon to come] Thanks Scott
__________________
Latest Builds:
|
|
|
|
|
|
05-11-2008, 08:04 PM
|
#12 | |
|
AF Enthusiast
Thread starter
Join Date: Mar 2003
Location: Zephyrhills, Florida
Posts: 981
Thanks: 4
Thanked 5 Times in 5 Posts
|
Re: Whit Bazemore's Matco tools Funny car
Thanks guys... I got some good progress going this weekend.
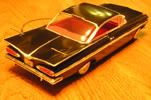
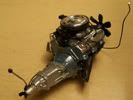
Front suspension and brake detail is complete. Front rotors are from the Machined Aluminum Specialties FC PE set. I robbed the calipers from a Tamiya Rally kit. They are a little big but look fine to me. All the brake lines are protech .018 braided line with small bead crimp collars in silver for fittings. 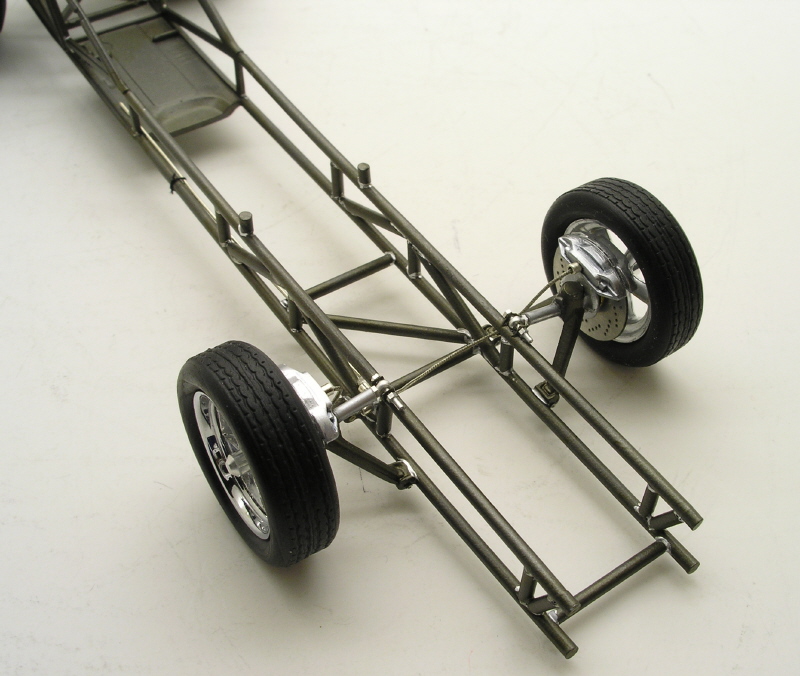 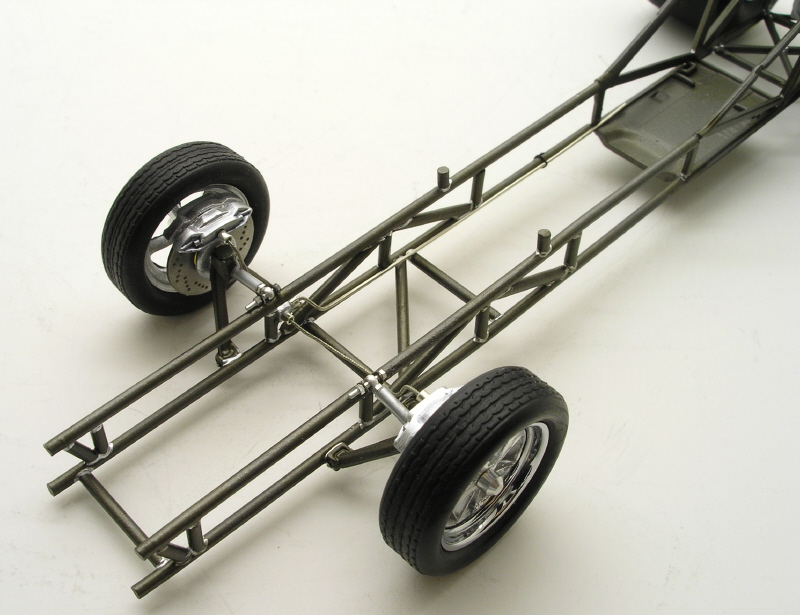 Another part I accomplished is the rear wheelie bar. This was made with 5/16 aluminum tubing, PE bits, a plastic piece of solid tubing for the wheel and RB motion Heim joints and hardware. 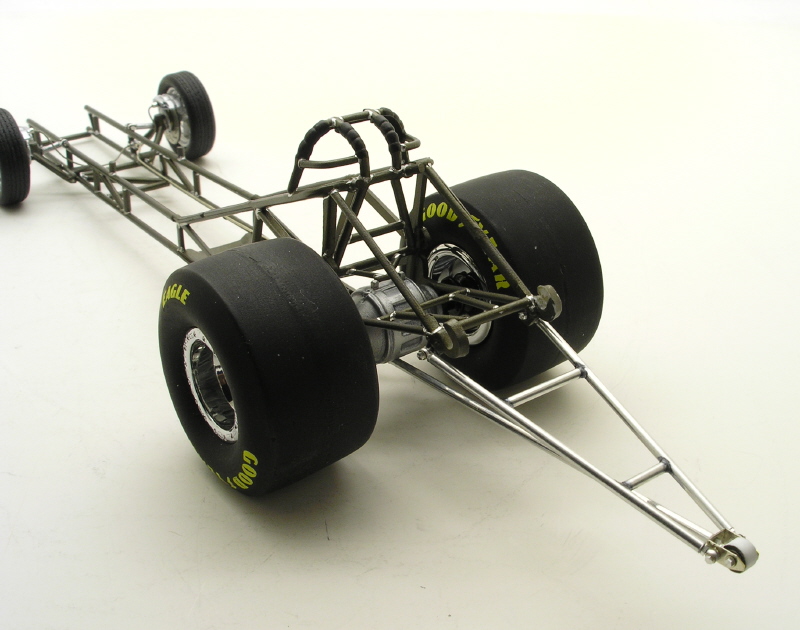 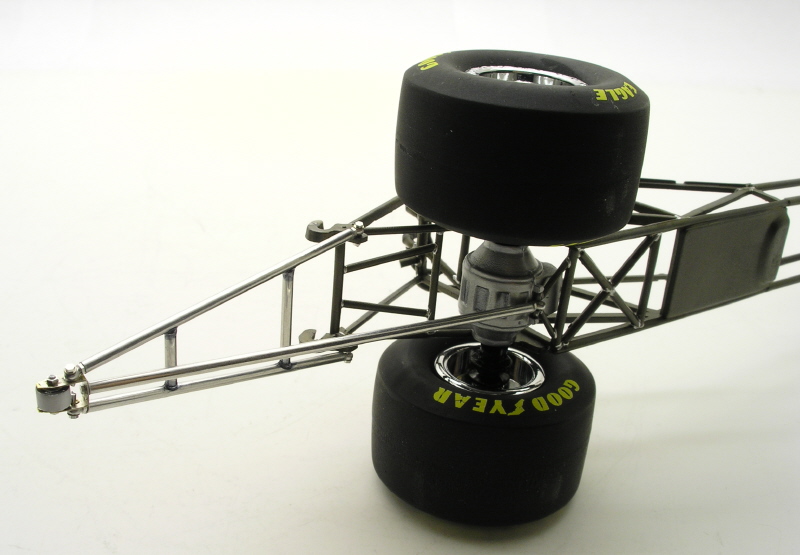 I had bought a Competition Resins front nose prop to hold the nose in the air to display the detailed chassis. I decided to make a new one fron 5/16 aluminum tubing and .062 solder along with thin aluminum for the ends. 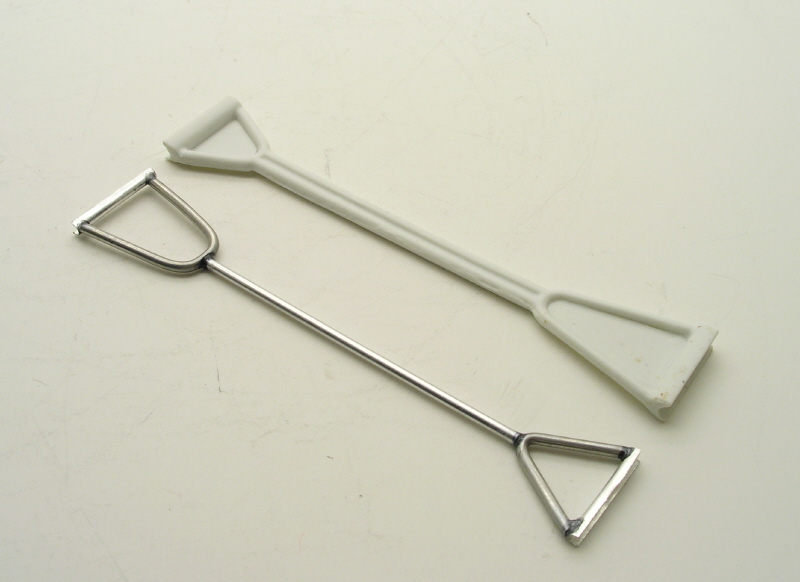 Progress on the engine. The Kobelco bagged Supercharger is from Competition resins. Front Pulleys are from Scale Repros Plus. The idler pulley brackets are from the MAS PE FC set along with the injector plate on top of the charger. The Injector lines and gold fittings are from the craft isle at Michaels. I really want to do something different for the belt. I like the Cogged belts from MAS but I feel they are a bit thick. I may have no choice but to use one, we will see!! 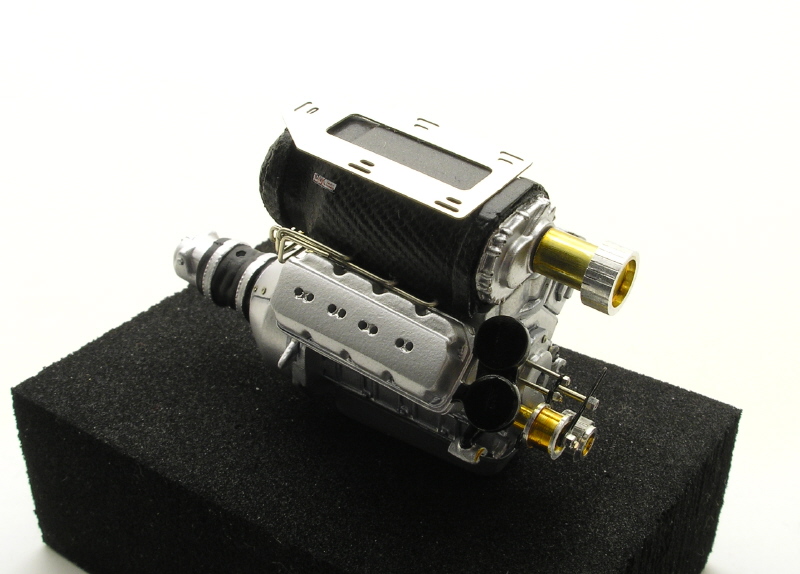 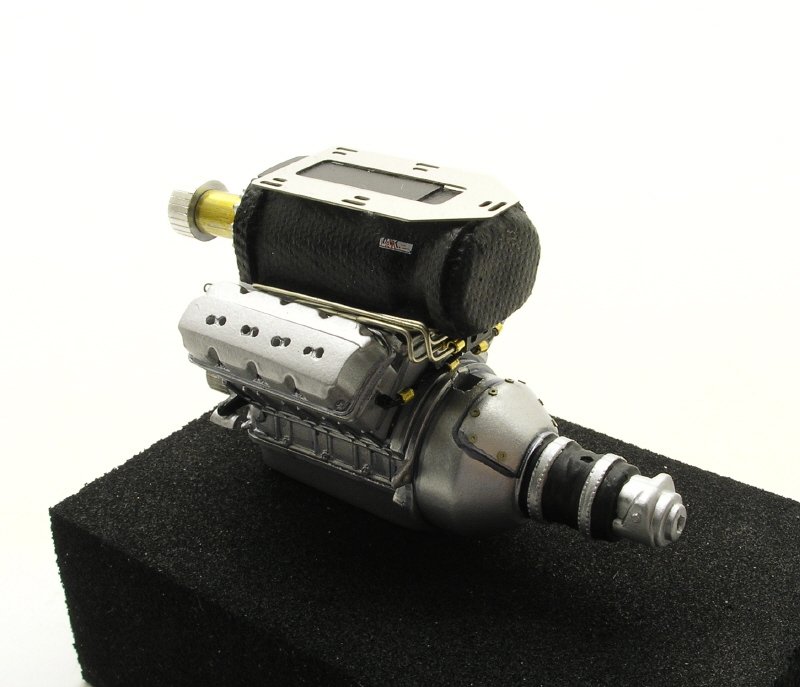 Here are a few shots of the naked chassis with the engine sitting in place. There is a hint of how detailed this chassis will be. 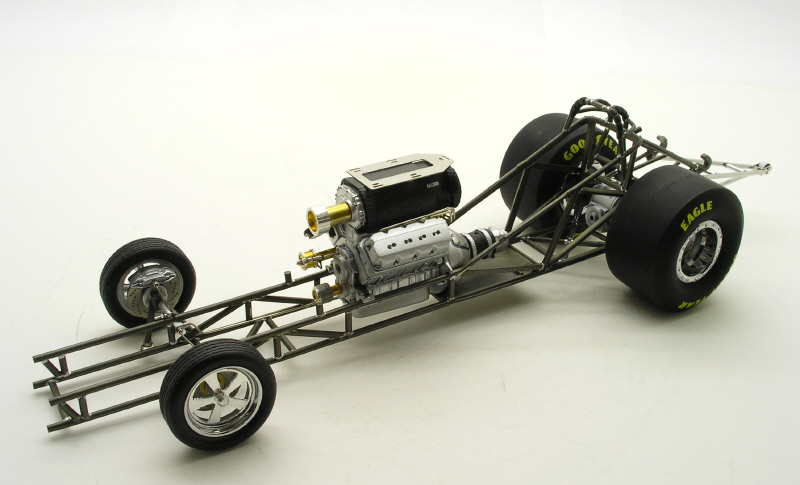 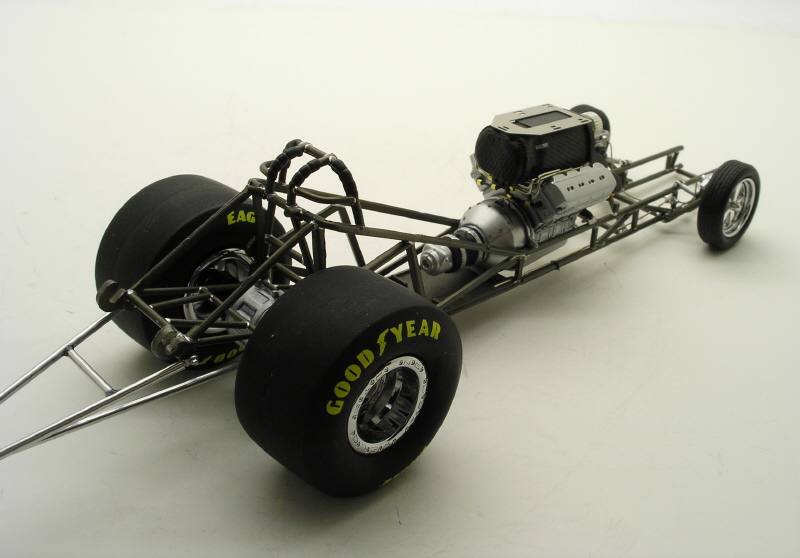 Body on the chassis photos. I think the front hood prop is a definite improvement over the CR one! 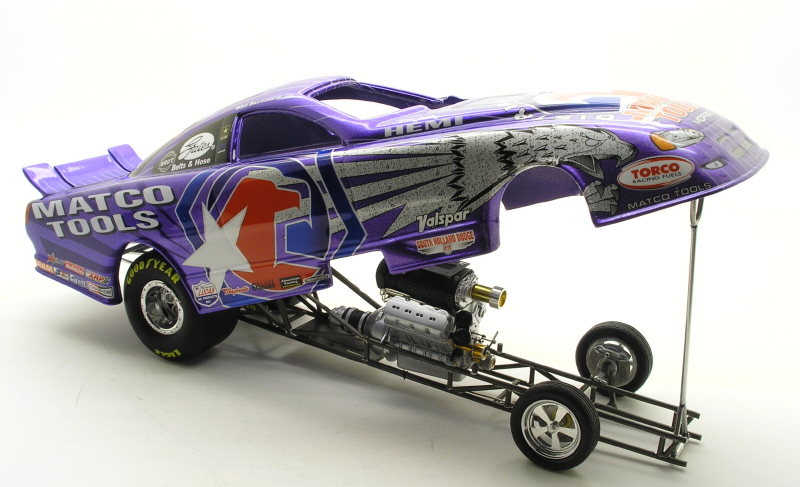 Rear shot. You can see that cool looking wheelie bar! 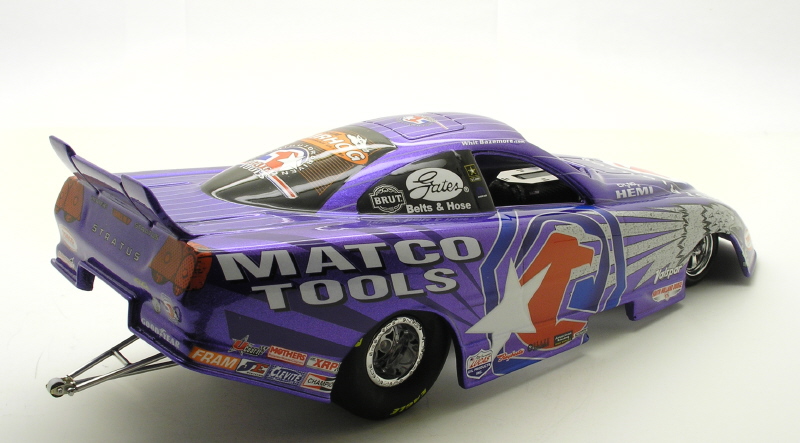 Nice side shot to view the stance I have achieved. Once the rear wings are installed it will look massive! Clay likes to call the Stratus body a giant slipper!! I tend to agree.... ;D 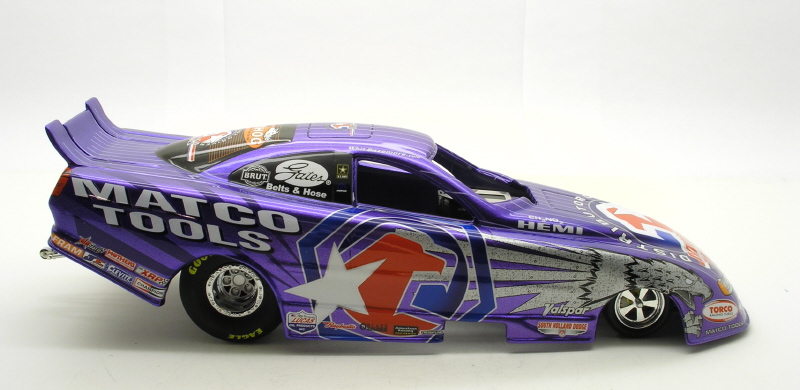 There is something cool about seeing that Metal plate through the window.... ;D 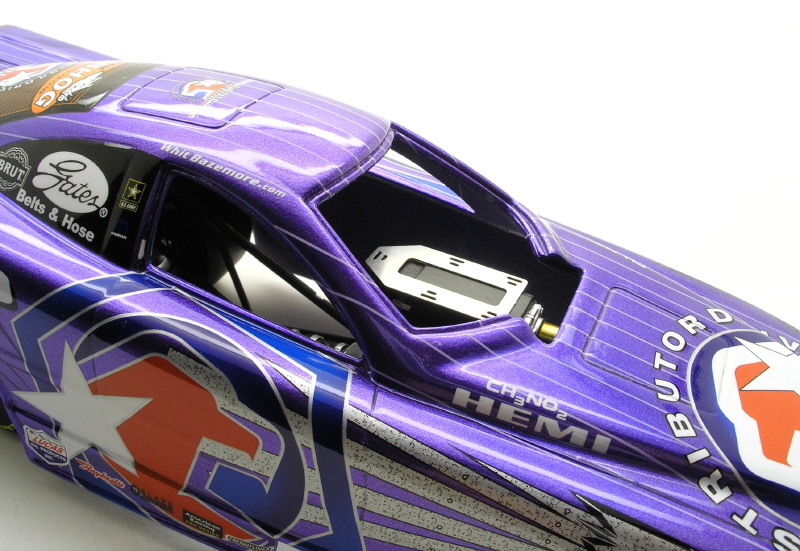 |
|
|
|
|
|
05-12-2008, 09:39 PM
|
#13 | |
|
AF Enthusiast

Join Date: Aug 2006
Location: Portland, Oregon
Posts: 633
Thanks: 2
Thanked 7 Times in 1 Post
|
Re: Whit Bazemore's Matco tools Funny car
WOW. Excellent work, as always.
Alex
__________________
|
|
|
|
|
|
05-13-2008, 01:01 AM
|
#14 | ||
|
AF Enthusiast

Join Date: Dec 2004
Location: Germany
Posts: 3,431
Thanks: 28
Thanked 79 Times in 73 Posts
|
Re: Whit Bazemore's Matco tools Funny car
Quote:
dito, fantastic work
__________________
Micha       
|
||
|
|
|
|
05-14-2008, 11:34 PM
|
#15 | |
|
AF Enthusiast
Thread starter
Join Date: Mar 2003
Location: Zephyrhills, Florida
Posts: 981
Thanks: 4
Thanked 5 Times in 5 Posts
|
Re: Whit Bazemore's Matco tools Funny car
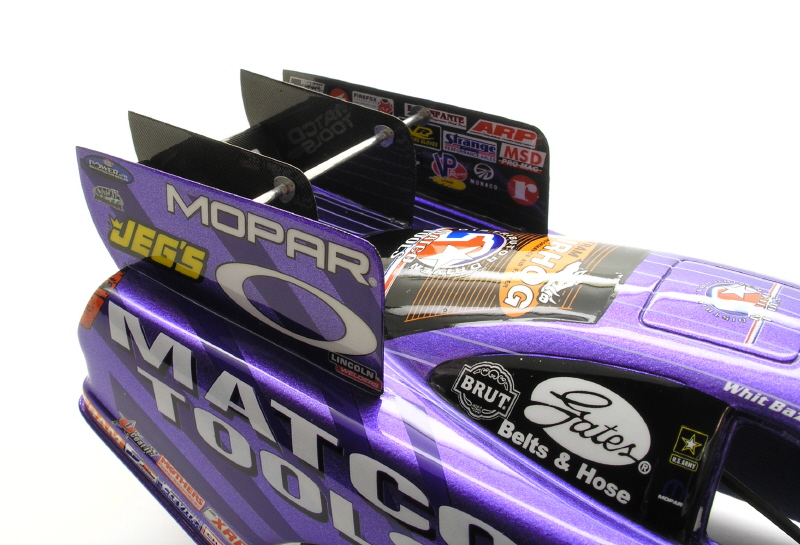
Thanks guys!!! The last few nites I have been working on the rear wing components.Covering them in SMS CF and dupont clear. Tonight I installed them and am pleased with the results.....Using thin metal instead of the CR Resin pieces adds to the realism I believe..... They were a bit finicky to get just right but finally cooperated. I sealed them in where they join the body with testors window maker and a few heavy coats of future.
    |
|
|
|
|
|
|
POST REPLY TO THIS THREAD |
 |
|
|

