|
|
|

|
|
| Search | Car Forums | Gallery | Articles | Helper | AF 350Z | IgorSushko.com | Corporate |
|
| Latest | 0 Rplys |
|
|||||||
| WIP - Motorsports Post topics for any "Work In Process" motorsports vehicles in this sub-forum. |
 |
 Show Printable Version | Show Printable Version |  Email this Page | Email this Page |  Subscribe to this Thread
|
|
|
Thread Tools |
 05-28-2016, 02:08 PM
|
#61 | |
|
AF Enthusiast
Thread starter
Join Date: Aug 2005
Location: where "sky grey" is a colour
Posts: 822
Thanks: 3
Thanked 32 Times in 29 Posts
|
Re: Audi R18 LeMans 2014 1:24
So, as I mentioned the last time, there was still one big(ish) step in the painting process to do. Most of the black surfaces on the car are matt, as you can see on this fender picture of the real thing.
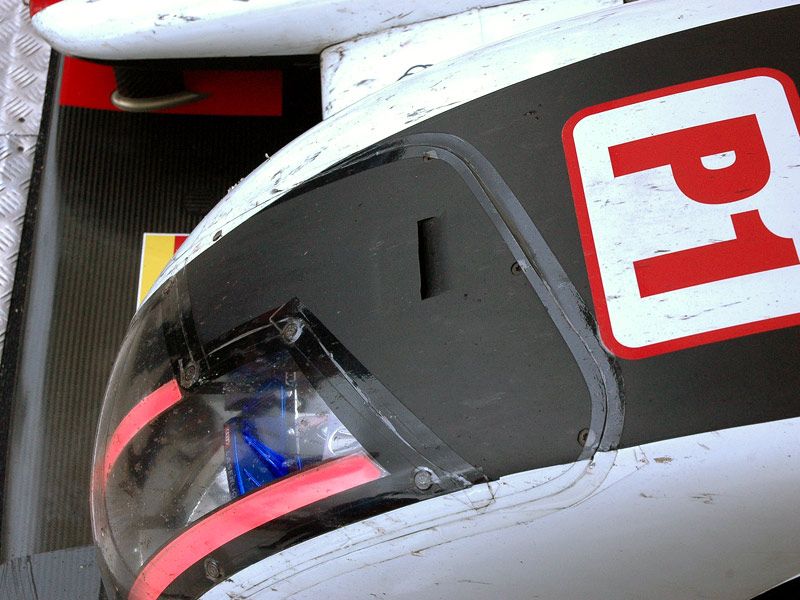 So, to cover these areas with one thin layer of clear coat, I had to mask almost the whole bloody model one more time. 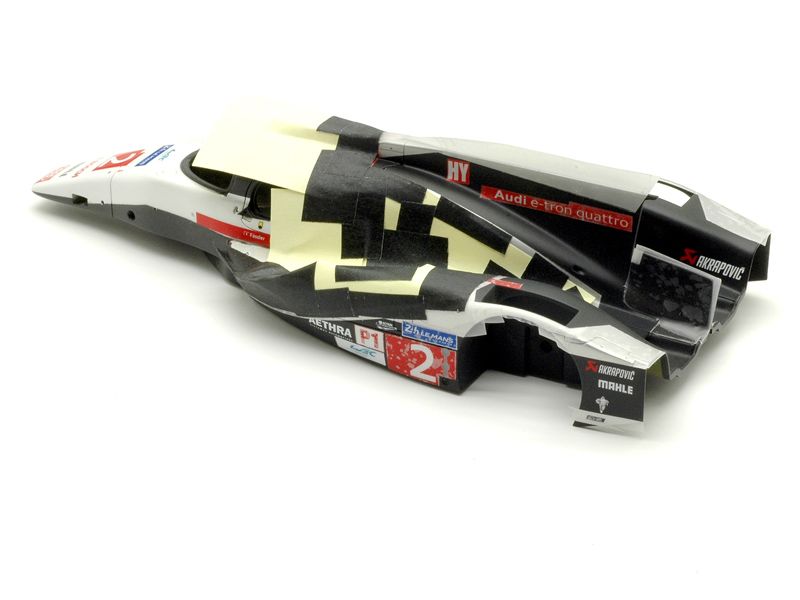 This meant hours of careful masking for about 5 minutes of airbrushing. I used a mix of Humbrol Clearcoat matt and semi gloss matt. Happily I was spared further disasters and all masking tape came off without trouble. 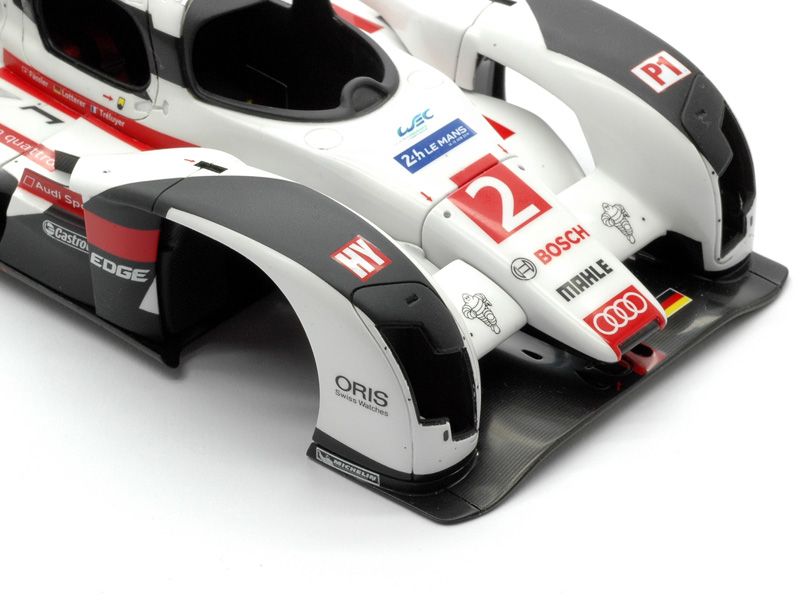 After this I could finally start the assembly of the model. The first parts were the headlights. I worked on them and various other pieces that will follow, while painting the main body parts. I had already shown the kit white metal parts in a previous update. What I didnt show was the parts fit. As you can see in the next picture the internal reflector bits were way too small. 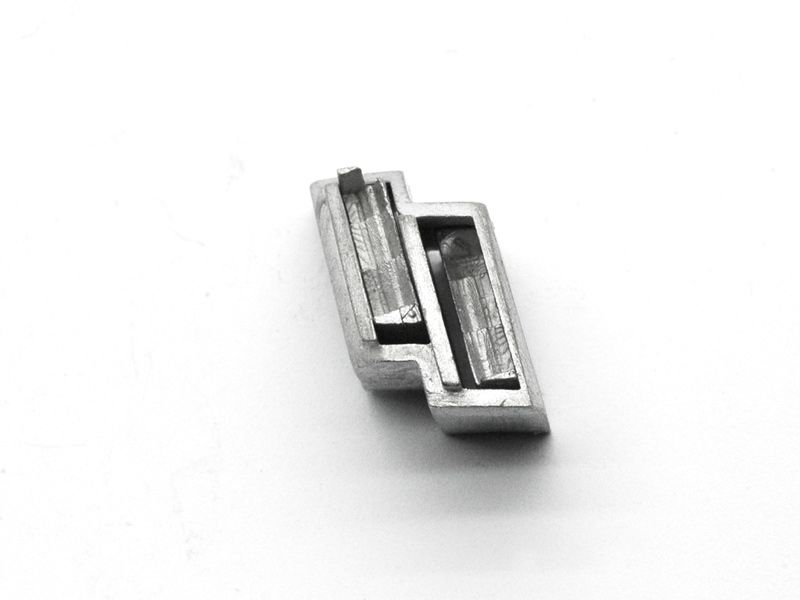 Also, there were a lot of lines visible from 3D-printing that werent removed from the masters. Since I didnt feel like fixing the white metal pieces, I made resin copies and worked on those. 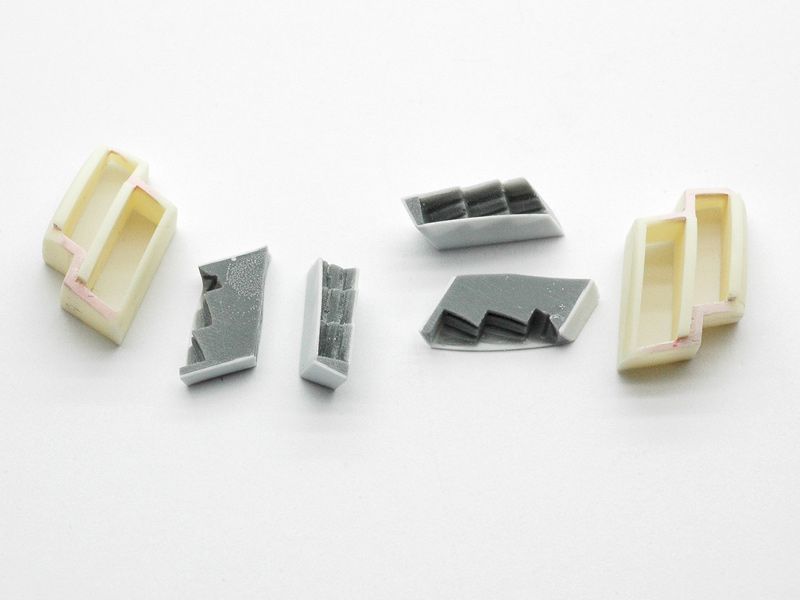 I still left some space between the parts for paint, but they were fitting better now. 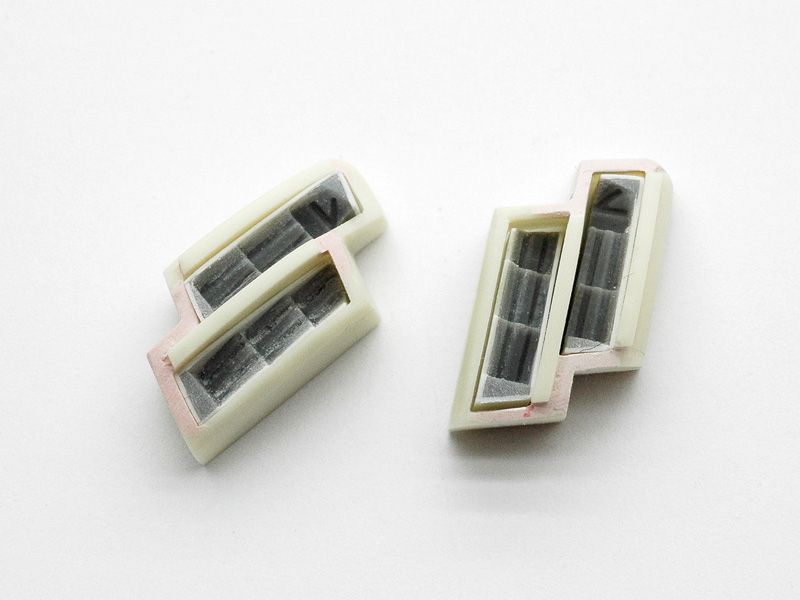 For comparison heres a real headlight, with the red ID LED strips illuminated. 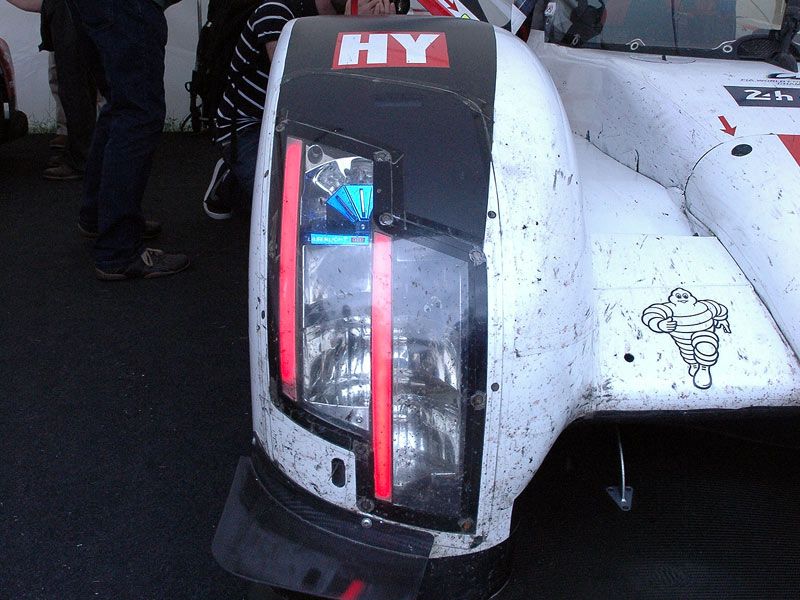 I opted for the grey look when they are turned off. For the blue Laserlight bits I made new parts from aluminium and painted them transparent blue, because the white metal blobs in the kit didnt look and fit right. The reflectors were painted Alclad chrome over a black base. 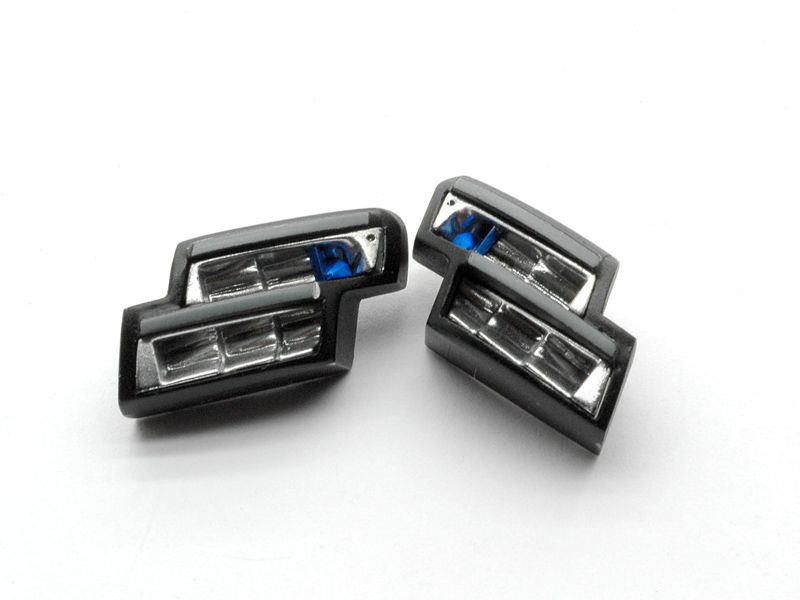 Then I glued the finished clusters in the fenders... 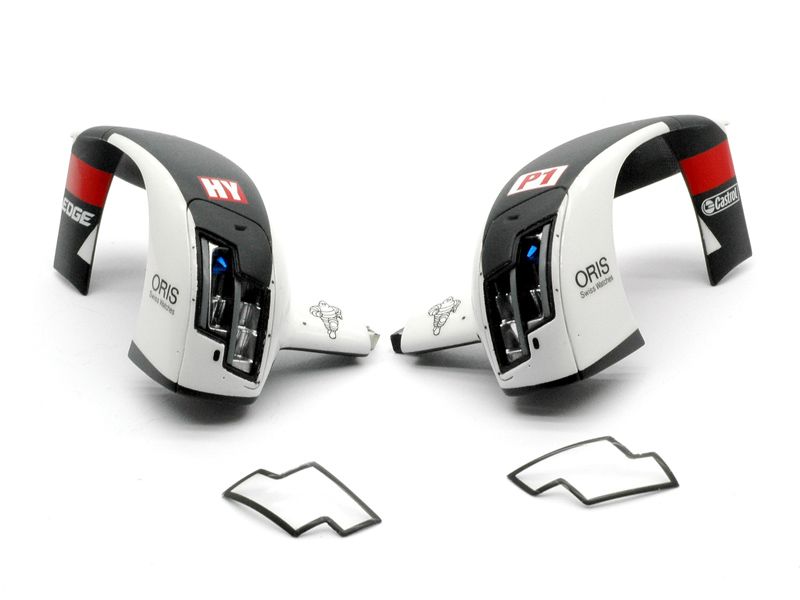 ...and to finish them off I had to put on the clear covers in front. Those were previously cut out from the kit vacform. The kit also comes with black decal frames for the clear parts, but ( surprise, surprise ) they didnt quite fit. I made my own with stripes of black decal on the back sides, protected the parts with heavy layers of 2K clear from both sides, which were sanded and polished, and finally glued them in place with small drops of epoxy glue, which are hidden by said black frames. 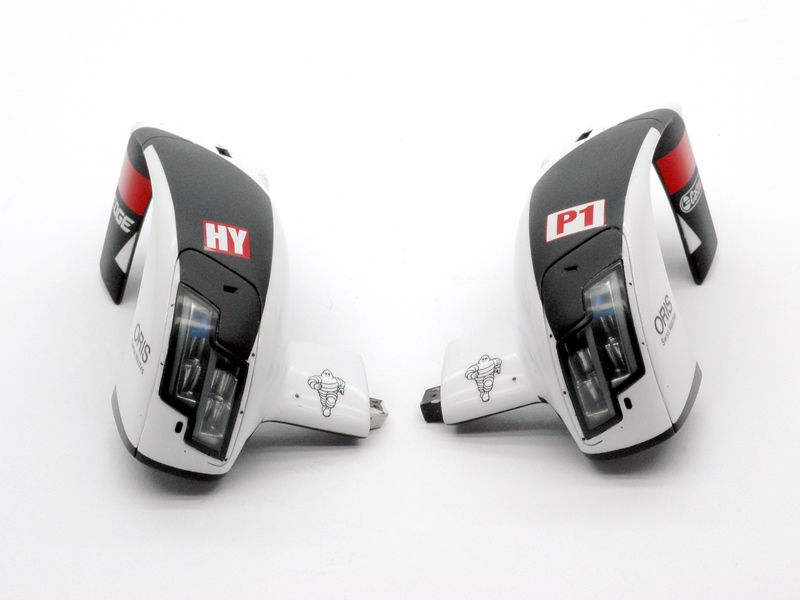 So much for now. Assembly will continue in the next update. |
|

|

|
|
05-28-2016, 02:44 PM
|
#62 | |
|
AF Enthusiast
Join Date: Mar 2009
Location: Rio de Janeiro, Brazil
Posts: 1,209
Thanks: 6
Thanked 144 Times in 136 Posts
|
Re: Audi R18 LeMans 2014 1:24
Great job!
__________________
https://www.instagram.com/denilsonvm_modelcars/ |
|
|
|
|
|
05-29-2016, 02:45 AM
|
#63 | |
|
AF Enthusiast

Join Date: Feb 2006
Location: Salonica
Posts: 1,336
Thanks: 138
Thanked 111 Times in 106 Posts
|
Re: Audi R18 LeMans 2014 1:24
My respects Master!
|
|
|
|
|
|
06-05-2016, 09:05 AM
|
#64 | |
|
AF Enthusiast
Thread starter
Join Date: Aug 2005
Location: where "sky grey" is a colour
Posts: 822
Thanks: 3
Thanked 32 Times in 29 Posts
|
Re: Audi R18 LeMans 2014 1:24
I continued with the other glass pieces. They also had to be cut from the vacform, which worked nicely. Then I added the decals. At the front I had to cut the black frame in two halves to make it fit and cut out my own piece of frame around the central air intake for the driver.
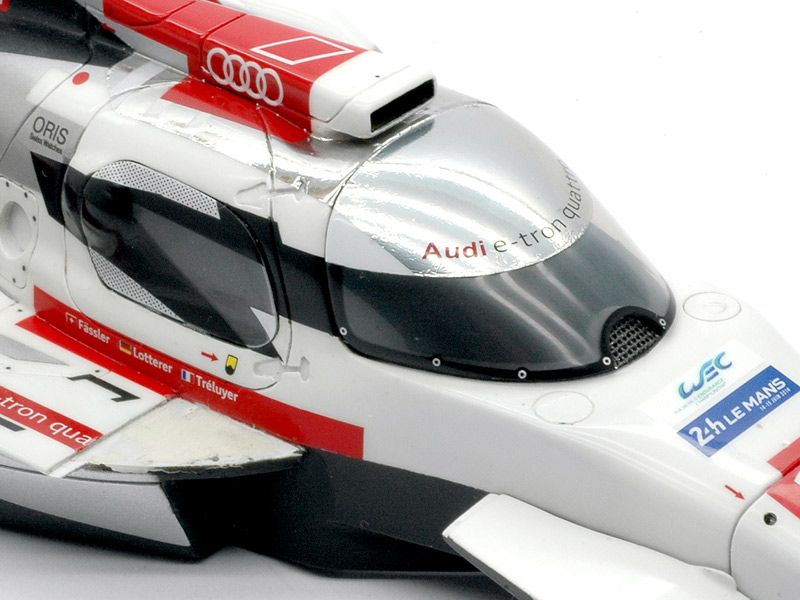 The kit comes with pre cut chrome stickers for the roof and top of the windscreen but I didnt agree with that pre cut shape. Sascha a.k.a. DieTeufel had recommended anyway to use Hasegawas mirror finish chrome film, because its thinner. I did that and have to agree that the stuff is very shiny and thin. So thin in fact, that you will see any tiny speck of dust, that gets under it... It took me several attempts to get the pieces on the roof cut out nicely and placed. The windscreen piece was even more difficult because its a big piece on a very curved surface which leads to wrinkles easily because the material is stiffer than decals and cant be tweaked with solvent. Cutting the correct shape out and then putting it on starting from the edge just didnt work. I ended up putting a bigger sheet on starting from the centre of the patch and then carefully massaging it to the edges in all directions. Then I cut it in place. When covering the pieces with 2K clear some new wrinkles appeared, pretty surely from the solvent in the paint, but I couldnt do anything about it at this stage. Its not as good as I had hoped but I decided to live with. Maybe next time I try Gunze clear instead, which seems to work so nicely for others. The side windows went through the same process...minus the chrome foil bit. On the right side I first thought Studio27 were kidding again, when I saw the big black sticker that covered half of the already small window. But they were right. 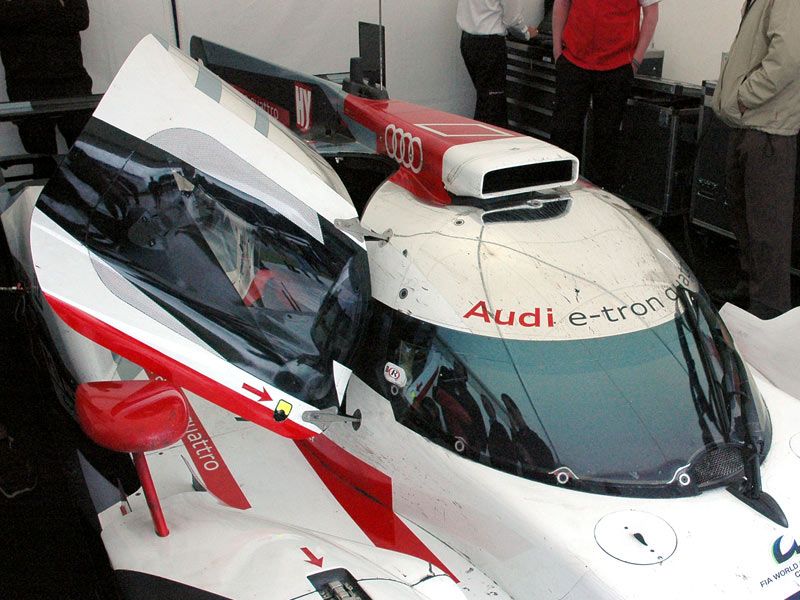 It looks like this protects the LMP drivers from being blinded by other cars, especially the higher GTs I guess, when going round them in places like Mulsanne Corner. Studio27 did have moment of another brain fade though, with the white sections of sticker on the side windows. They are not completely white, but theres a hole pattern to create a mesh, resulting in a greyish appearance of the surface. To represent that, they printed a decal with a grey mesh pattern. That may work on the white decal paper... but not on a dark background like the side window, where youd receive just a dark surface. I mean...really, S27??? So to fix that, I printed a black dot pattern on white decal paper. I couldnt print it as fine as on the real car, but it works o.k. 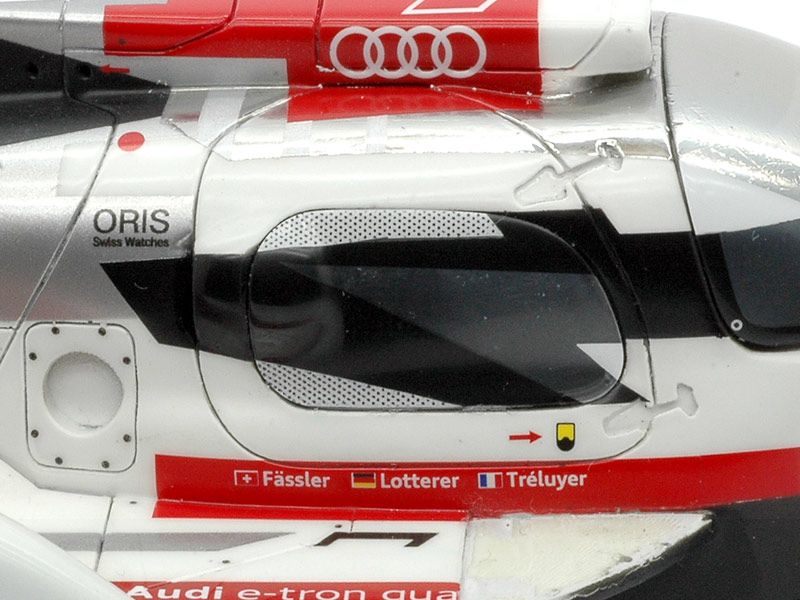 Next up I glued the sidepod aero blades on the undertray. 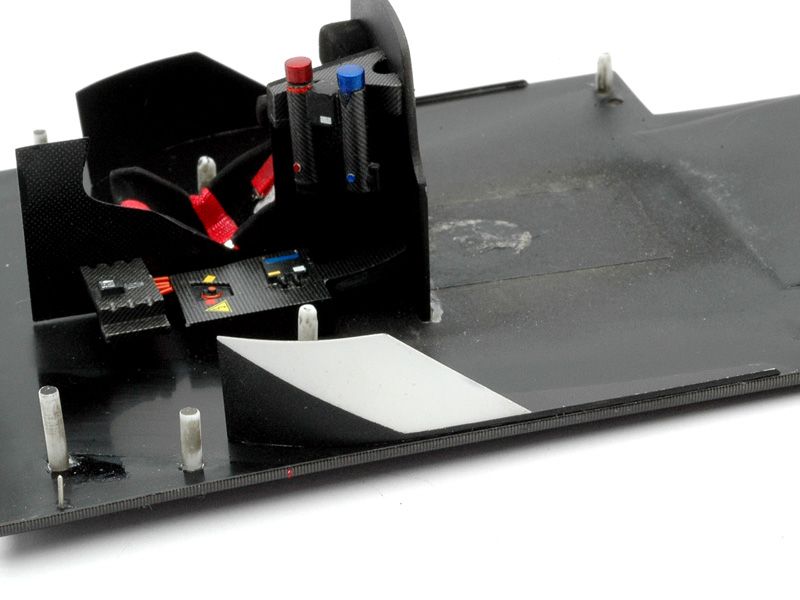 Followed by the ones at the rear of the car... 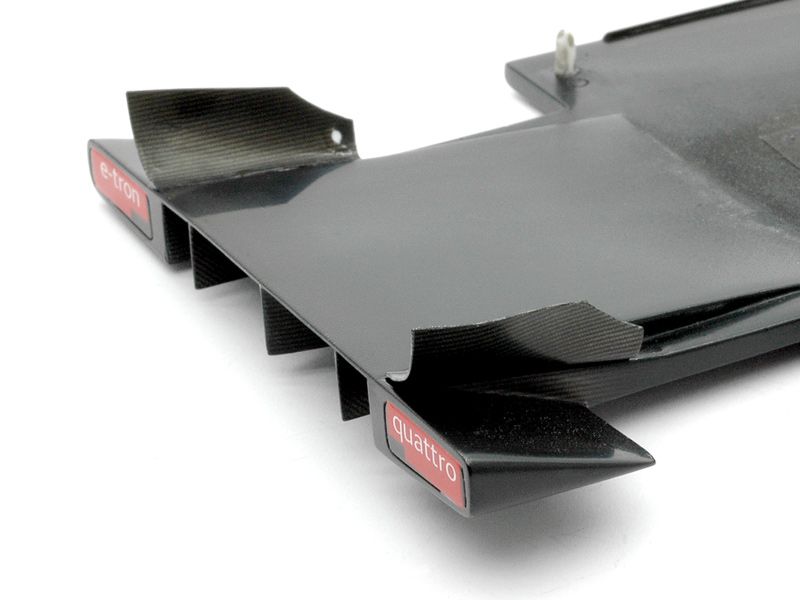 And after gluing the dashboard in place ( which will hardly be visible from now on ), I glued the main body on the undertray, using epoxy glue. 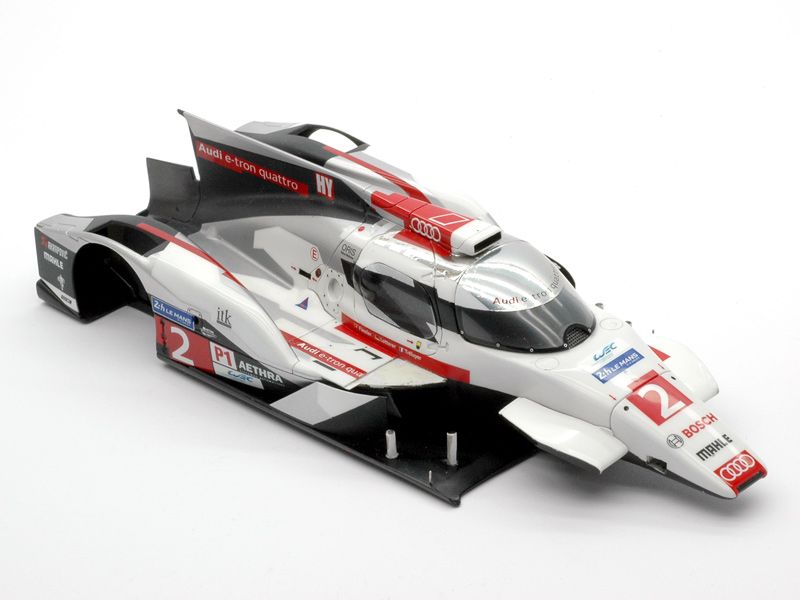 From the back the car looked like this at this stage. 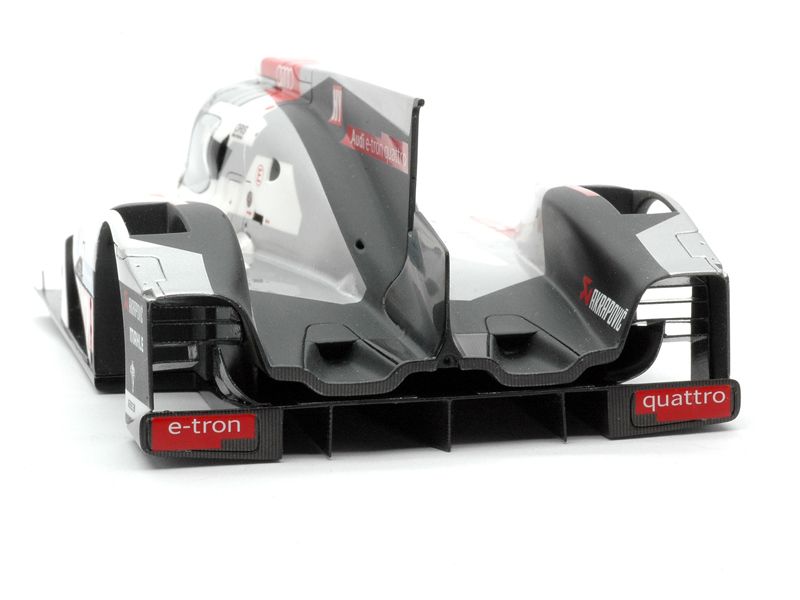 Prior to putting the body on, I had also glued in the aero bits in the fenders behind the rear wheels. Thats it for today. More bits and glue in the next update :-) |
|
|
|
|
|
06-06-2016, 01:12 AM
|
#65 | |
|
AF Regular
Join Date: Jun 2015
Location: Dunfermline
Posts: 370
Thanks: 38
Thanked 52 Times in 51 Posts
|
Re: Audi R18 LeMans 2014 1:24
Loving the look of this. All the effort has paid off. You will have a stunning car at the end
|
|
|
|
|
|
06-06-2016, 11:52 AM
|
#66 | |
|
AF Newbie
Join Date: Apr 2016
Location: Orlando, Florida
Posts: 24
Thanks: 0
Thanked 0 Times in 0 Posts
|
Re: Audi R18 LeMans 2014 1:24
Best car build project ever!
|
|
|
|
|
|
06-06-2016, 02:33 PM
|
#67 | |
|
Loser

Join Date: Aug 2007
Location: Moscow
Posts: 1,170
Thanks: 110
Thanked 248 Times in 195 Posts
|
Re: Audi R18 LeMans 2014 1:24
Incredibly scrupulous work.
__________________
Best regards, Mikhail   
|
|
|
|
|
|
06-11-2016, 09:11 AM
|
#68 | |
|
AF Enthusiast
Thread starter
Join Date: Aug 2005
Location: where "sky grey" is a colour
Posts: 822
Thanks: 3
Thanked 32 Times in 29 Posts
|
Re: Audi R18 LeMans 2014 1:24
Following the last update I carried on adding pieces.
Next were the forward sidepod elements ( or rear parts of the front fenders...however one defines that :-) 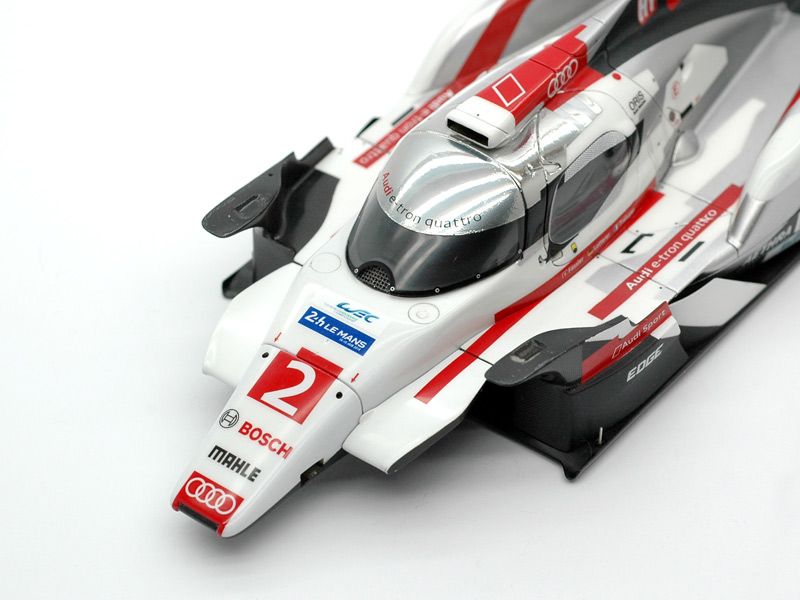 And then the fenders themselves... 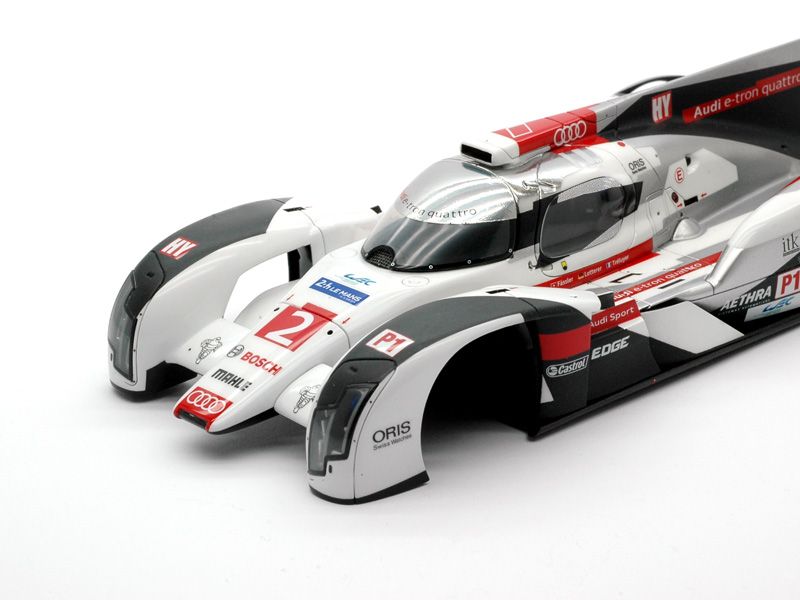 With them in place I could also install the front splitter. This was detailed up with the front wing flap, white metal wing supports and etched parts. The bits that connect the splitter and flap needed some careful modifying to look right. I opened the slots to stick the arms through instead of gluing them on. Ill spare you further comments about Studio27 thinking this time :-) 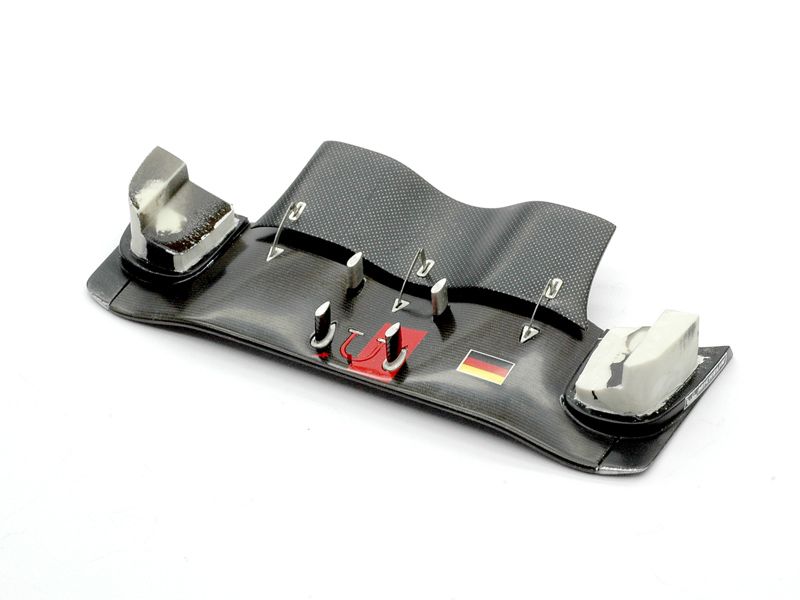 Here the splitter is in place. 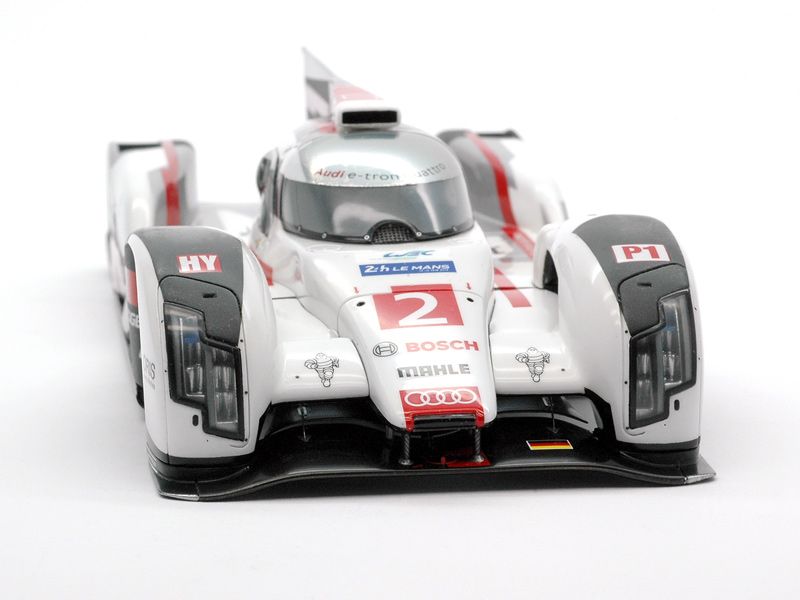 It looks alright in this picture, but the parts fit/lineup of the front end somehow suffered during the paint process, starting with the front end of the undertray. Theres quite a bit of tension in places and as a result there are some shutlines that have become too big and the left fender is a bit lower at the front than the right one, which results in the splitter being slightly angled. Its not a massive issue but bugs me a lot nevertheless. But to maybe fix it, I would have to take everything apart again, risking a lot of damage to the parts and thats not worth it, so itll stay the way it is now. So I carried on with the wheels. Here are one each of the front and rear uprights, after painting, some Scale Production CF decal and with brakes and etched hub centres installed. 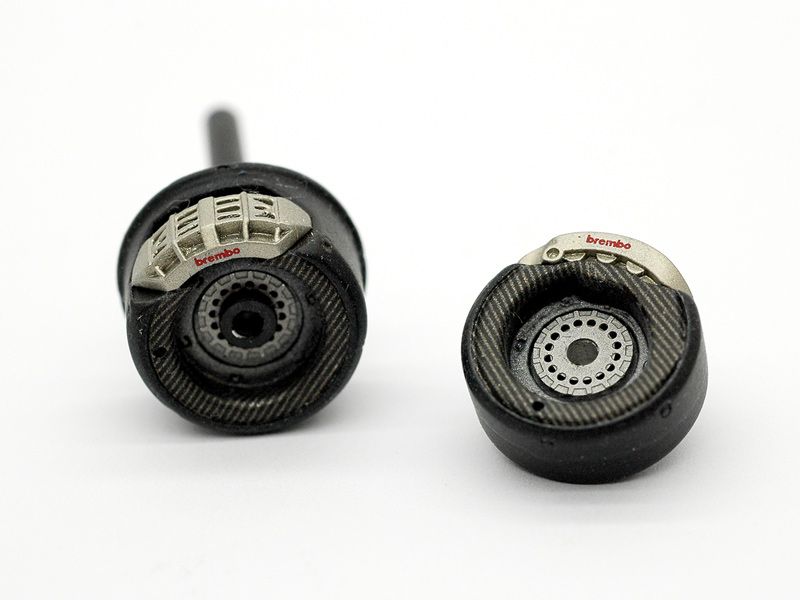 The front ones then get these additional aero bits on the insides mounted. 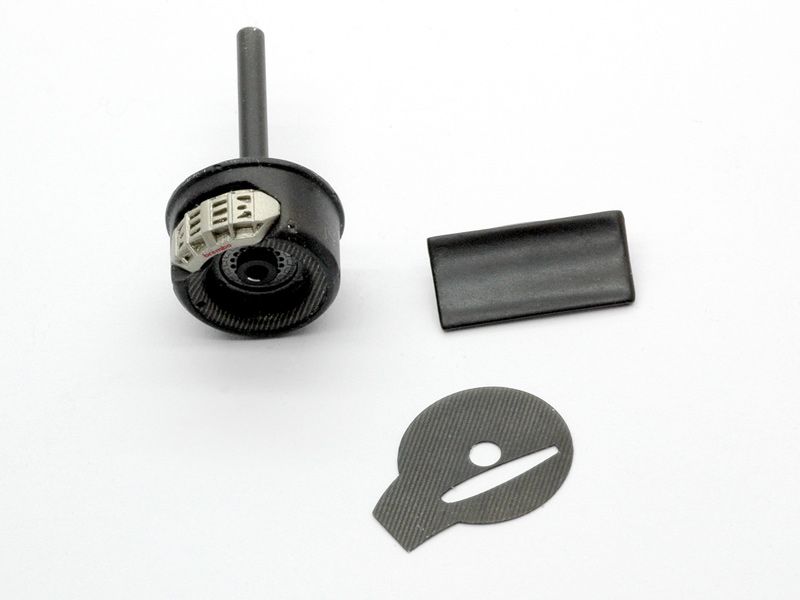  And here the uprights are on the car.  The rims received their black paint after more sanding and priming in the mean time. Some decals and a protective layer of semi gloss clear paint followed. The centre lock nuts and studs are white metal bits and an etched disc in the kit. I didnt trust them to hold the car without a lot of glue, so I reinforced them with turned aluminium parts. 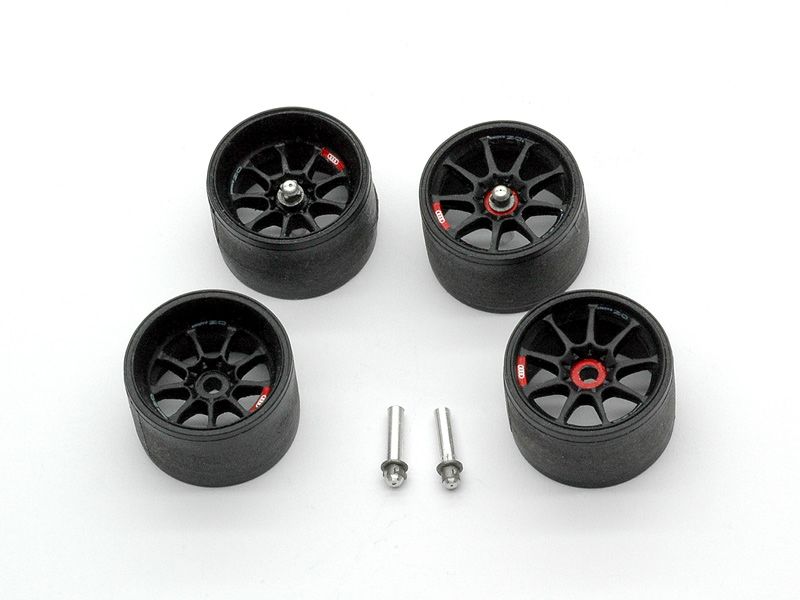 The tyres had a spin on the lathe as well, to get the treads evenly scrubbed. After mounting them on the rims I added some of the typical Michelin sidewall detail. I superglued very thin threads of plastic sprue ( heated over a candle ) on them very carefully, trying to not mess everything up :-) After the decals, I covered everything with a thin layer of semi gloss clear, which hides some glue marks and the decal carrier film. 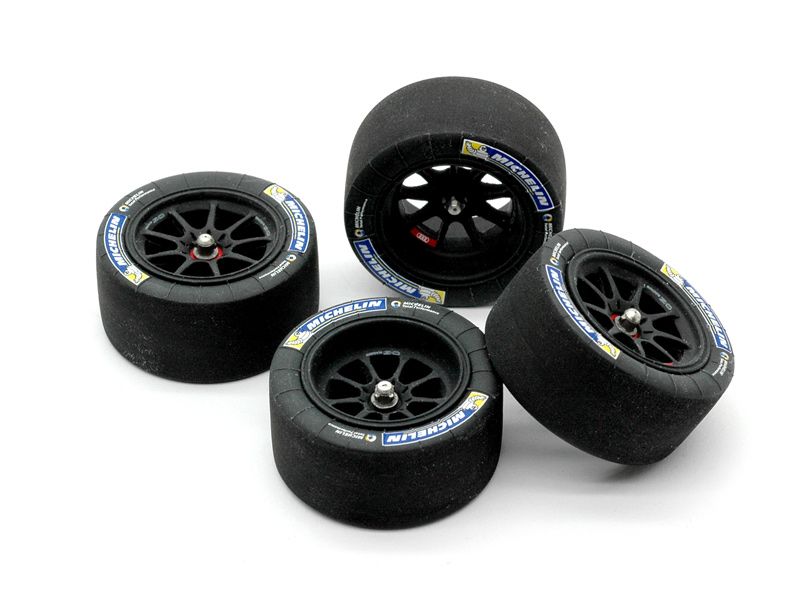 So I could finally put the car on its wheels. 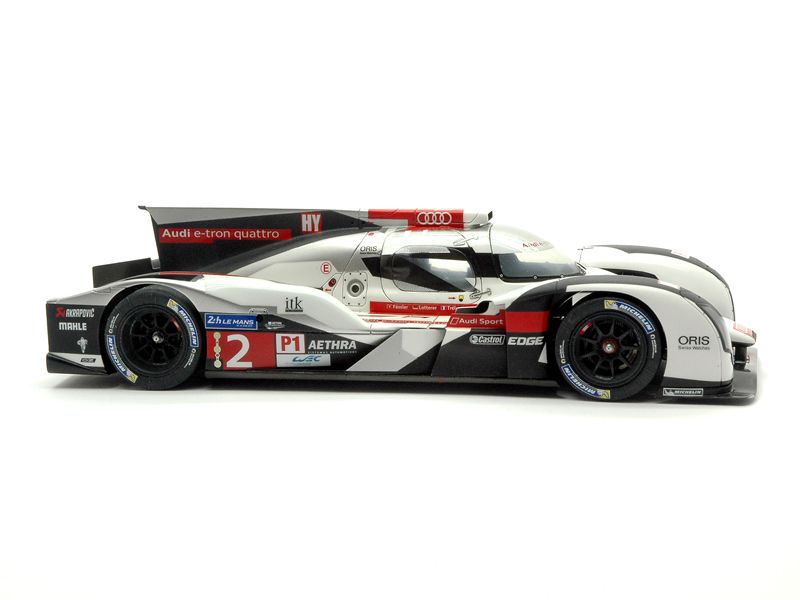 The splitter sits rather close to the road now, but at least I managed to not have it touch the ground on the left side, after some careful tweaking. You can see though, that the front end is somewhat bent, in this last picture. 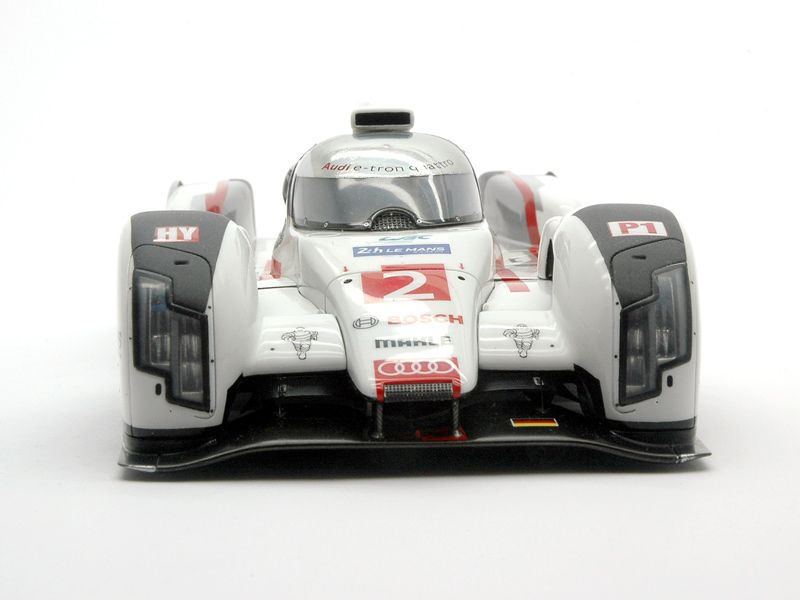 |
|
|
|
|
|
06-12-2016, 08:09 AM
|
#69 | |
|
AF Regular

Join Date: Nov 2008
Location: Sweden
Posts: 281
Thanks: 14
Thanked 27 Times in 26 Posts
|
Re: Audi R18 LeMans 2014 1:24
Your work is nothing short of amazing. Such an inspiration!

__________________
Men love women...but even more than that! Men!...Love!...CARS! 
|
|
|
|
|
|
06-13-2016, 07:25 PM
|
#70 | |
|
AF Enthusiast

Join Date: Oct 2008
Location: Auckland
Posts: 2,761
Thanks: 51
Thanked 136 Times in 134 Posts
|
Re: Audi R18 LeMans 2014 1:24
Oh man thats looking amazing!!! Great work!
__________________
 It's Not wheather you Win or Lose, its how you look while you play the Game |
|
|
|
|
|
06-14-2016, 03:03 AM
|
#71 | |
|
AF Newbie
Join Date: Jul 2006
Location: bourges
Posts: 20
Thanks: 6
Thanked 1 Time in 1 Post
|
Re: Audi R18 LeMans 2014 1:24
I can't find a word to qualify your job. Amazing is not enought, wonderful is too light, I need to imagine another
 The car is like the real! |
|
|
|
|
|
06-14-2016, 05:38 AM
|
#72 | |
|
AF Newbie

Join Date: May 2016
Location: Athens
Posts: 62
Thanks: 6
Thanked 7 Times in 7 Posts
|
Re: Audi R18 LeMans 2014 1:24
you have put A LOT of effort in this build but it has definitely paid off..
the only problem is that, one cannot tell how this kit would turn out without all the extra hours you put in, you know ...box-stock!  |
|
|
|
|
|
06-14-2016, 06:57 AM
|
#73 | |
|
AF Regular

Join Date: Nov 2012
Location: Adelaide
Posts: 238
Thanks: 4
Thanked 35 Times in 35 Posts
|
Re: Audi R18 LeMans 2014 1:24
Love the detail! Amazing build
|
|
|
|
|
|
06-14-2016, 09:11 PM
|
#74 | |
|
AF Regular
Join Date: Jan 2012
Location: douglas
Posts: 102
Thanks: 0
Thanked 16 Times in 16 Posts
|
Re: Audi R18 LeMans 2014 1:24
Top class.
|
|
|
|
|
|
06-16-2016, 04:31 PM
|
#75 | |
|
AF Regular
Join Date: Jan 2012
Location: douglas
Posts: 102
Thanks: 0
Thanked 16 Times in 16 Posts
|
Re: Audi R18 LeMans 2014 1:24
Wow, fantastic model but have you any idea the anguish this causes to claustrophobia sufferers?
Seriously, would you want to do 200mph in that capsule? |
|
|
|
|
|
|
POST REPLY TO THIS THREAD |
 |
|
|


