

|
| Search | Car Forums | Gallery | Articles | Helper | AF 350Z | IgorSushko.com | Corporate |
|
| Latest | 0 Rplys |
|
|||||||
| WIP - Street Post topics for any "Works In Progress" street vehicles projects in this sub-forum. |
 |
 Show Printable Version | Show Printable Version |  Email this Page | Email this Page |  Subscribe to this Thread
|
|
|
Thread Tools |
|
|
#16 | |
|
Image Hosting Exceeded
 Join Date: May 2003
Location: Flying in circles
Posts: 4,233
Thanks: 23
Thanked 97 Times in 87 Posts
|
Re: BMW 318i (E36)
__________________
PHOTOBUCKET SUCKS |
|
|
|

|
|
|
#17 | |
|
Image Hosting Exceeded
 Join Date: May 2003
Location: Flying in circles
Posts: 4,233
Thanks: 23
Thanked 97 Times in 87 Posts
|
Re: BMW 318i (E36)
So about those headlights...
I was driving along at some point a year or two ago, noticing the great proliferation of cars with LED accent lights. I've wanted to do one in 1/24 using fiber obtics for some time (a Ferrari 458 would be my choice), but I don't want to buy a new kit for it- and nearly everything in my collection is from before this became a popular fad in automotive styling. But then it occurred to me that with a bit of effort, it shouldn't be hard to make illuminated headlight rings for a BMW- and BMWs I have!  With a bit of looking, I came across thefiberopticstore.com . Happily, they seemed readily prepared to send me multiple diameters of fiber optics at hobby appropriate lengths an costs. They even threw in a free red illuminator. I bought a small roll of 0.25mm and 0.50mm fibers. In 1/24, they match fairly closely to 5mm and 10mm- which are two very common sizes of LEDs. The 0.50mm is for another silly project that I will hopefully have to show soon. But the 0.25mm seemed perfect for some Angel Eyes. 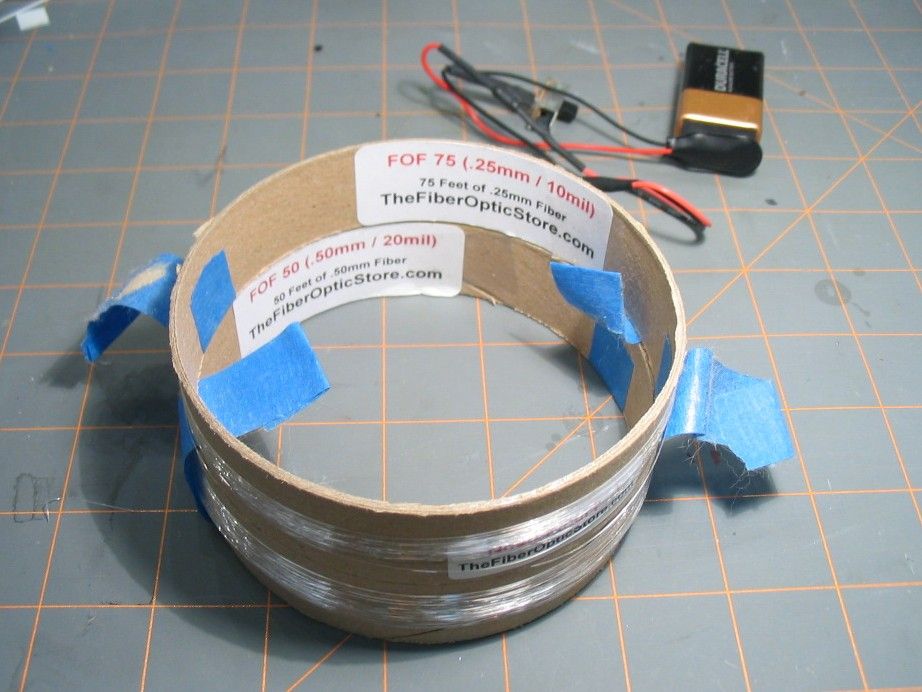 So this is what I came up with. A short length of aluminum rod was turned down to a suitable diameter. I cut a dished concave in one end to serve as a headlight reflector. Then, I merely wrapped the entire diameter in fibers. 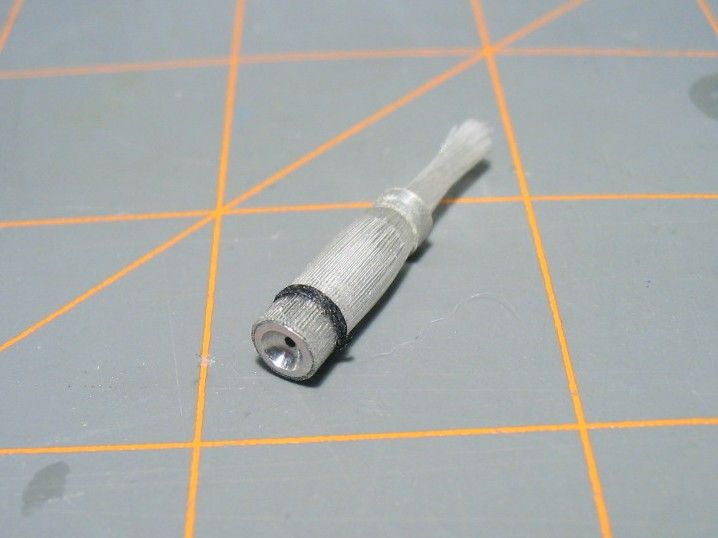 Ok to be honest, gluing the fibers in place turned out to be tedious, painstaking work. They are glued with Microscale foil glue- which happily worked very well in this application. But this represents nearly an hour's worth of work- lining each fiber up properly, pressing it into place, and being careful not to contaminate the glued surface. I wrapped thread around the whole thing to keep the fibers in place, and the aluminum collar at the end holds the fibers together for illumination. Results?? 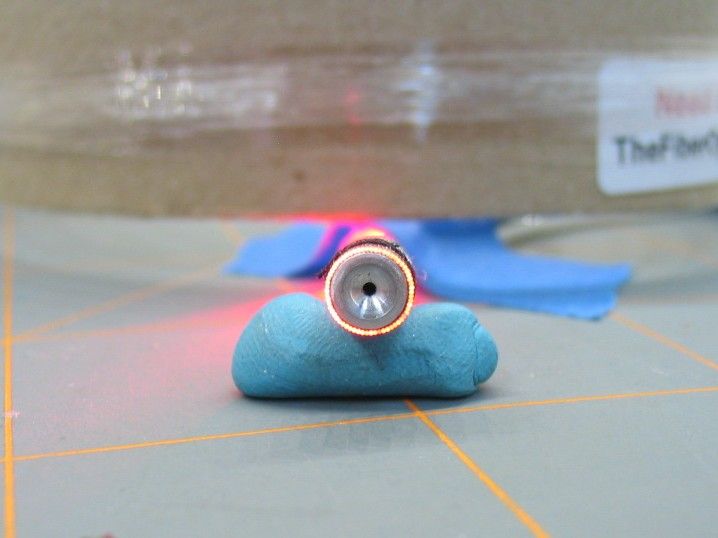 Not bad! For a tiny little lighting project, I was fairly satisfied with it. This is using the red illuminator that was included with my order. Granted, I wasn't exactly looking forward to making three more of these, but it seemed that it would at least be worth the effort. That is, until a practical reality struck.  Test fitting showed that this assembly fit in place just fine, and looked quite good. But I only needed to fit the chassis to the body once to conclusively demonstrate that this was simply not going to work.  It turns out that there is almost no space at all behind the headlights of an E36. (Which really I should have known.) The hump for the wheel well is directly in the way. It turns out that there is almost no space at all behind the headlights of an E36. (Which really I should have known.) The hump for the wheel well is directly in the way.  Some of you may remember the 007 film (and Z3 advertisement) Goldeneye, in which Q proudly proclaims that he's managed to stuff Stinger missiles behind the headlights of the Z3. Now pay attention, 007. In truth, a Stinger missile is a tube fully five feet in length. If one were mounted behind the headlights (ignoring the fact that it would have to pass directly through the front wheel!), the other end would be squarely in the driver's crotch. (Now guess what happens when that missile is fired?) Enjoy! Truthfully, Q would have been hard pressed to stuff a can of tennis balls behind the headlights of a Z3- or of a 318, on which the Z3 is based. Back to the drawing board. Really, this project was in serious danger of being shelved for another decade.  But then a short time later, I got a chance to borrow a recent X5 on a driving trip out west. One evening I took a close look at the headlights. It seemed that the halos were a solid glass sleeve that fit around the headlights, and that the sleeve was illuminated by LEDs from below. This quickly inspired an idea- I could probably do something similar. 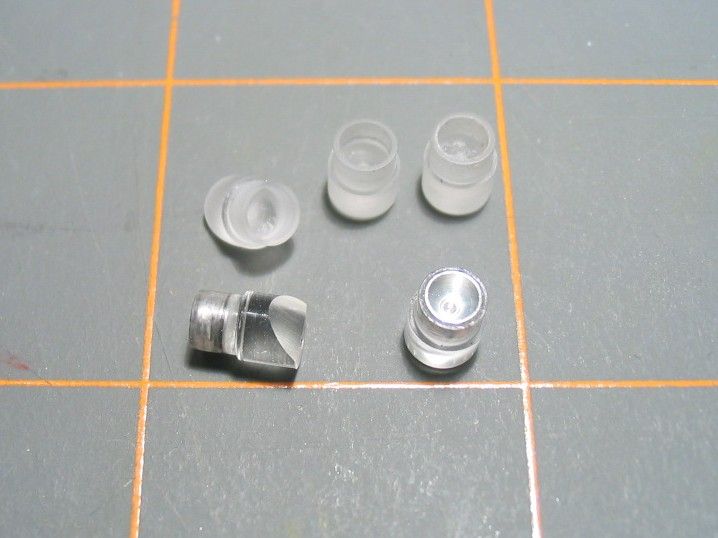 The results! I made little optical glasses out of clear acrylic. The front end was drilled out for an aluminum headlight reflector, and the back ends would be lit from below. Installed, they looked like this. The LED is held immediately under the lights. 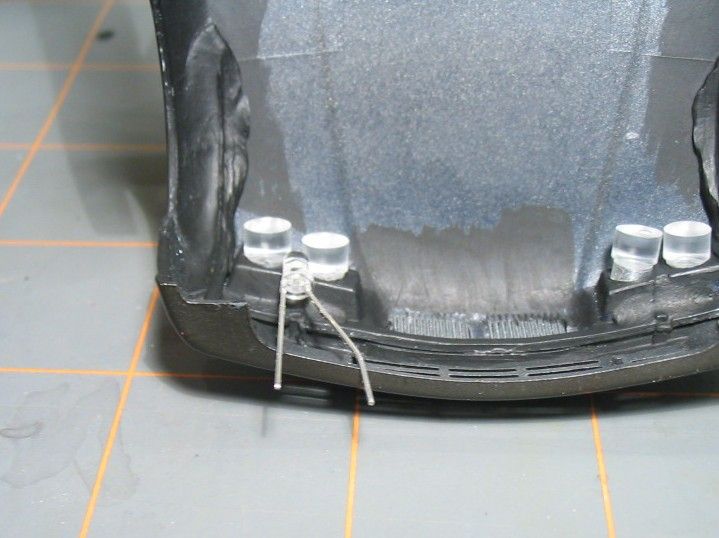 Here the inboard set of lights fit just fine. The outboard set however are actually too long and protrude against the wheel wells. The lower rear corners would have to be removed to allow them to fit- but happily this solution worked. I made about a dozen of these, to get the shape, sizes, and techniques right. When acrylic is machined thin, it gets fragile- several broke in the fitting process. Initially I assumed that polishing them clear would allow the best light transmission. But it turns out that when I left them unpolished with a frosted finish, they gave the best appearance. 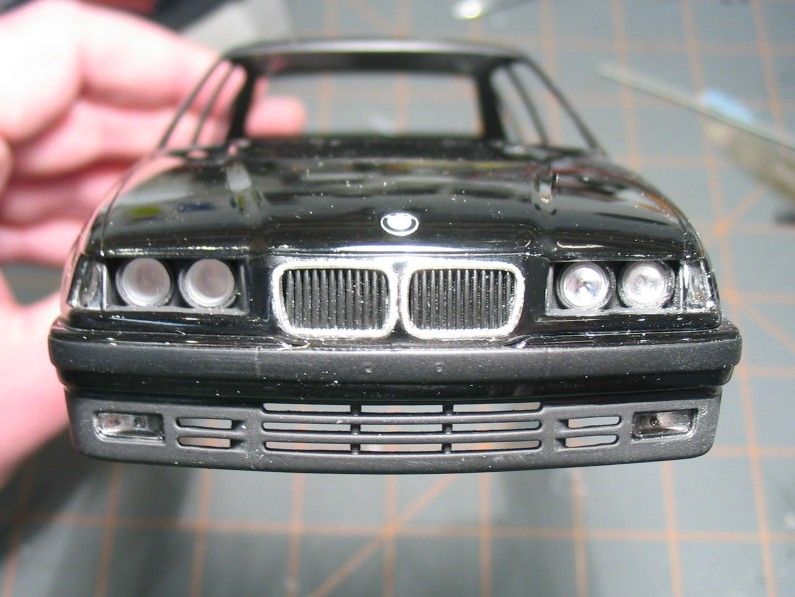 Here they are test fitted from the front. The right side has reflectors fitted, and the left side does not. When illuminated from behind or below, they transmit light very nicely. 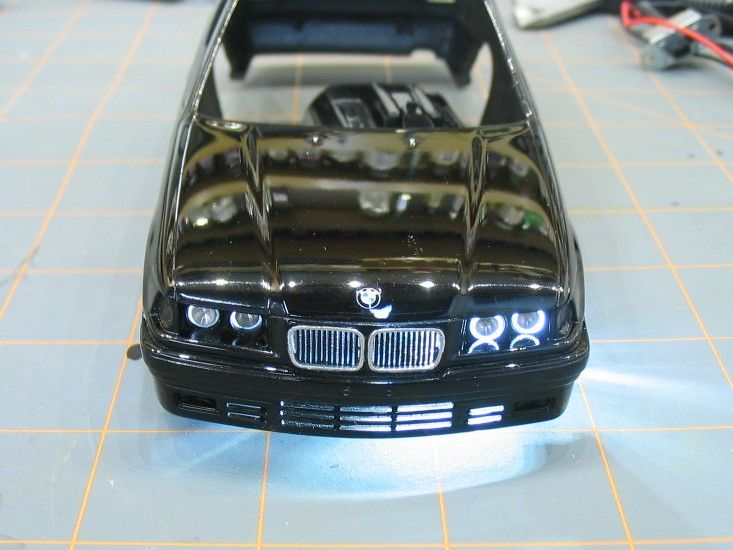 And here they are finished. I'm pretty happy with the results. 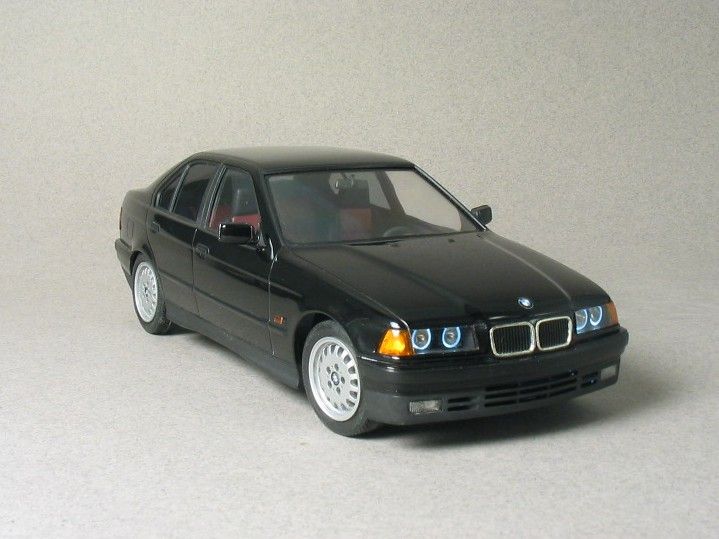 Thanks for watching. More finished pics can be found here.
__________________
PHOTOBUCKET SUCKS |
|
|
|

|
| The Following User Says Thank You to MPWR For This Useful Post: |
eugene78 (02-10-2016)
|
|
 |
POST REPLY TO THIS THREAD |
 |
|
|